| |||
 |
 |  | |
 |  | ||
 |  | ||
 |  | ||
 |  | ||
| |||
|
|
| | |
| | ||
| | ||
| | ||
| | ||
| Written by Paul D. Race for Family Garden Trains(tm)
and New Boston and Donnels Creek: |
 |
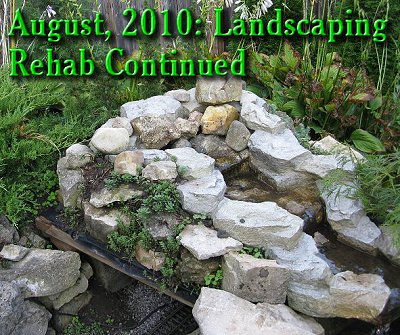
August, 2010: Landscaping Rehab Update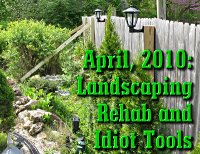 This is a follow-up to April, 2008's article on Landscaping Rehab and Idiot Tools. That article discussed a grocery list of garden infrastructure problems and upgrades that I had to do before I could even think about working on the tracks and trains in early 2010. This is a follow-up to April, 2008's article on Landscaping Rehab and Idiot Tools. That article discussed a grocery list of garden infrastructure problems and upgrades that I had to do before I could even think about working on the tracks and trains in early 2010.
It showed me actually making a bit of progress. By late spring, though a career change and record-breaking temperatures kept me from following up on that early semblance of progress. Summary of April AccomplishmentsIn April, of 2010, I
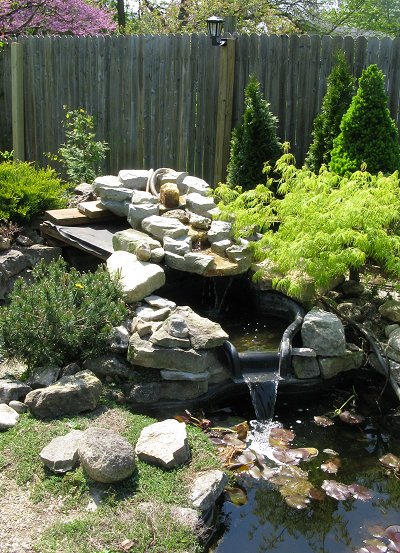
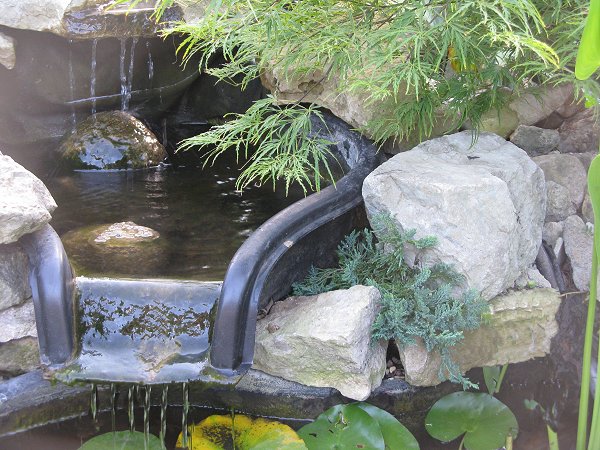
Work Left To Do On The WaterfallThe following photos show the waterfall and pond as I was forced to leave working on them at the end of May.
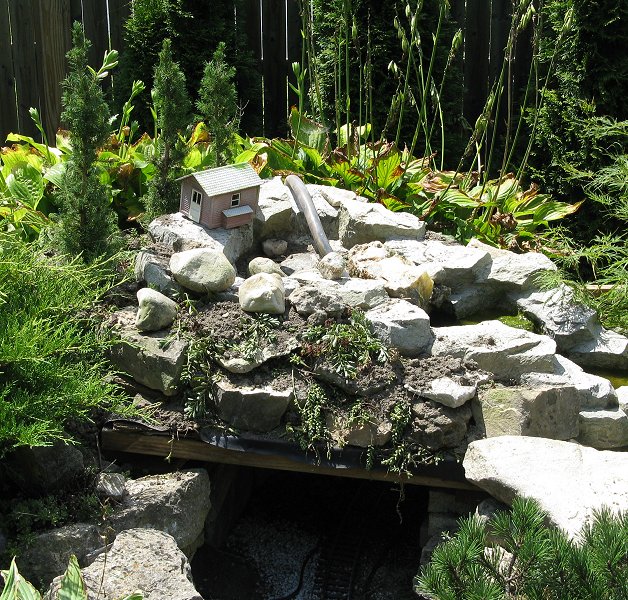
The photo to the right is taken from above and behind the newly-installed "creek-like" device. You can see that the "back" of the waterfall was also just a rock pile with sedums filling the apparent gaps. This would need serious backfill, and maybe some more trees and rocks to reduce the appearance that the waterfall comes out of nowhere. Work Left to Do on the Retaining Wall
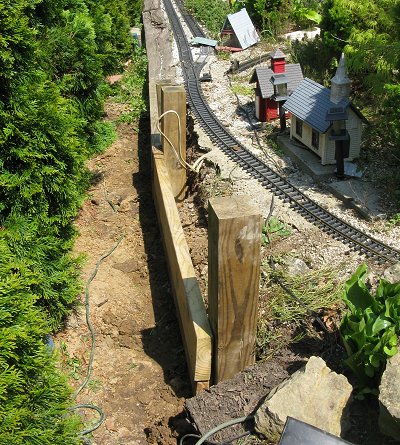
As I mentioned earlier, I left the 4x4s a little long because I want to put an outlet on one of them, and I may have a use for the other one as I add certain potential features to the railroad. Getting Dirty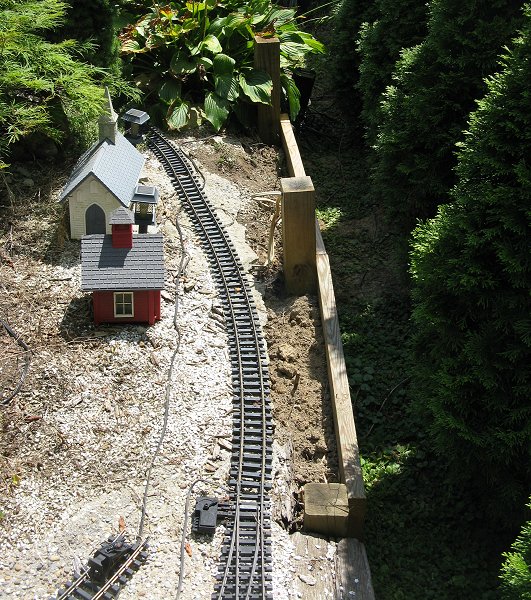 When I left this project, the next big step was going to be bringing in backfill. I brought in several wheelbarrows full from a dirt pile elsewhere on the property. But surprisingly it didn't take as much as I thought it would to do the job. When I left this project, the next big step was going to be bringing in backfill. I brought in several wheelbarrows full from a dirt pile elsewhere on the property. But surprisingly it didn't take as much as I thought it would to do the job.
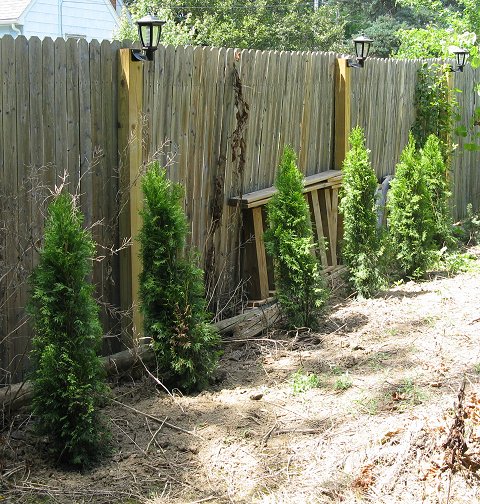
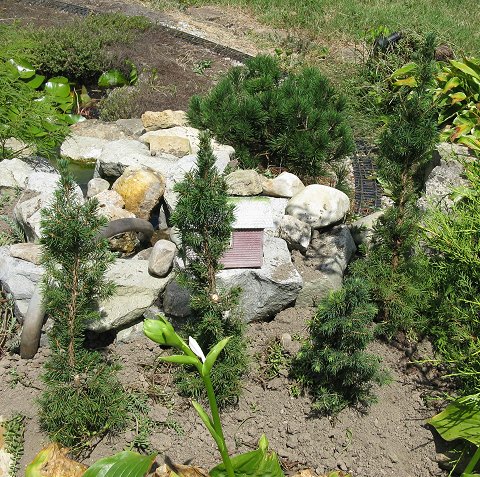
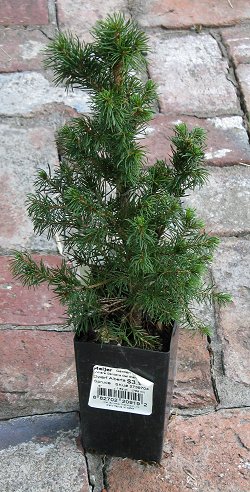
When I backfilled along the new retaining-wall structure, as shown to the right, I stopped about four inches from the top. The rest is going to be concrete, because that part of the railroad is getting harder every year either to see from normal viewing positions, or to reach for maintenance. I also squoze as much dirt under and around the new waterfall fixture as I could, using layers of rocks to hold the dirt in place and camouflage the edges of the resin fixture. I also transplanted sedums from other part of the railroad. Transplanting small sedums involves uprooting bits or just tearing off hunks, then sticking the back-ends of the things - roots or no - Low-growing sedums like Stubby Fingers and Golden Crown went toward the viewers's side of the waterfall. Blue Spruce Sedum, which can grow tall but get invasive, went on the other side. Such sedum plantings had helped even my old ugly waterfall fixture look like a permanent part of the landscape. I was sure they would help the new one look like it fit in soon. The photo to the right above is what sedums look like when you first transplant them in 90-degree weather. (Click on it to get the full effect.) But if you keep watering them every day that it doesn't rain, you'll see them perking up and filling in. By next year, their roots will have spread under the waterfall fixture, where they'll stay cool and moist all year round, and the daily waterings will become unnecessary. Going GreenIn addition, this project dragged out so long that I started to pick up evergreens (my favorite garden railroading plant) cheap at end-of-season sales. I got several little Dwarf Alberta Spruce and a few Blue Rug and similar spreading Junipers.One surprise was finding several 3'-tall Emerald Green Arborvitae in very good condition for a very reasonable price. I had planted about fifteen 1'-tall specimens of the same variety between my railroad and the property line years earlier to camouflage my neighbor's trash piles. (I got them for $3@ at an end-of-season sale.) With very little attention, they have grown nicely until they are now 4' - 6' tall. Though they are getting crowded out by my neighbor's privacy fence, they look really nice from my side of the yard and provide a nice backdrop for the trains - especially in late autumn when I cover them with Christmas lights. The privacy fence, in the meantime, stretches another 30 feet or so south of the end of my railroad, creating what could be a nice area for recreational activities, more trains, or something else. During the summer, our view of that part is shielded by an ill-planned row of Japanese Honeysuckle the previous homeowners left us, but during the winter, it's just plain ugly. So, the first part of rehabilitating that part of my yard would include killing all the weeds that grew up between the honeysuckle and the fence and planting something closer to the fence to eventually hide it. I had thought about planting arborvitae along that part of the fence, too, to continue the look behind the railroad. But by now the trees behind the railroad were over 4' tall, and buying a bunch of 4'-tall trees isn't like buying a bunch of 1'-tall trees. Unless you come across them 60% off at the end of the season. . . .
The photo to the right above shows the trees in position (yes, I should have cleaned things up better before I took the photo, but there you have it. The ground looks blasted, because I've cleaned out the weeds but haven't put anything in their place yet. Still, in spite of the 90-degree temperatures we had for most of June and July, daily waterings have kept the trees alive, and I suspect they'll get a nice growth spurt next spring. By then, I may have figured out what to do with this little corner of the yard. Hopefully something that requires minimal mowing or weeding. Back to the railroad, I also backfilled behind the waterfall. I had thought of raising the earth there higher than the top of the waterfall, to make it look like it was coming out of a mountain, versus BEING the mountain. Unfortunately, there isn't much space there to work with, unless I wanted to take the time to completly rebuild that end of the railroad. So I settled for planting some trees and sedum that should eventually add apparent depth and height to the "back" of the "mountain."
When I planted them behind the waterfall, I rotated them to put the best side toward the typical viewing position. So they look pretty funny in the photo to the right, taken from an angle that visitors don't usually see. I didn't want them to look exactly like the "three sisters" or something, so I staggered them a little and added a little 8" DA Spruce that I had got from Meijers in a tiny little pot that wouldn't even stand up by itself. Heaven only knows who they were marketing them to, but they're ideal for squeezing into tight places on a garden railroad. The little trees don't even have a discernable shape yet, and they're too frail at this time of year to trim aggressively, but they'll shape up and be shaped up later on. I inserted Stubby Fingers sedum around the little spruces, with the idea that the sedum will eventually help stabilize the soil and keep the trees' roots cool even on hot days.
Things are Looking Up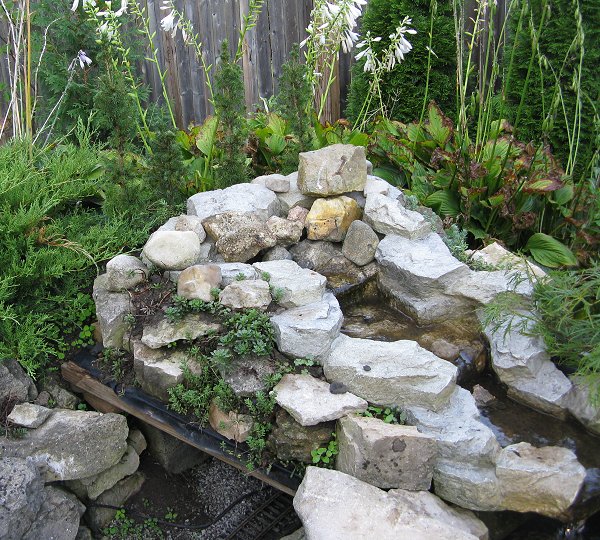 The photo to the right shows the sedum/waterfall installation a few weeks after the earlier photos. You can see that the sedum has "perked up" wonderfully. By the way, this stuff will grow somewhat all fall and winter, so by spring, you probably won't see any dirt between the rocks, and very few rocks. You can see why I love this stuff.
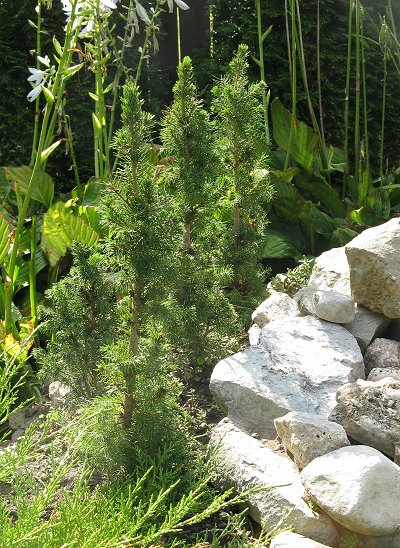
If you click on that photo to see the "blow-up," you'll also see the little spruce trees, though they're hard to make out because the hostas behind them have grown so tall.
I still have to so something to represent a portal over the "tunnel." In the previous incarnation, I just nailed a piece of weathered tomato stake across the edge and that looked just fine, being "organic" and all. I'll probably do something like that here, at least for now. By the way, I have a very nice tunnel portal that I used to use on this end of the tunnel, but I was always having to pull it off to do track maintenance or something. At this stage of life, when I have to choose between looks and ease of maintenance, let's just say that the latter is winning out more often. I also have to be honest - several of the trees I bought at the end-of-season closeout don't look so good, including a threadleaf maple I bought to replace one that died back two years ago. This is a reminder that spring and fall are the best time for planting trees of any kind, and that anything you plant in the heat of summer will need extra care until the frosts start. . Other Stuff Left to DoOne thing you may or may not be able to figure out in the photos, is that a few of the 4"x4" posts I put in to brace the neighbor's fence have twisted, and one has bent a tad. If I want them to be "optimum," I really should think about connecting them somehow, maybe with 2"x6" pressure treated boards running along the top. And wouldn't that be a good place to run a back-and-forth trolley or something? :-)ConclusionSo summer is almost over and I have yet to get most of the railroad into real operating condition. In addition, summer's record heat has blasted the hostas and other summer plants to the point at which they almost need cut down - something I usually do in late September. On the other hand, my railroad hasn't really be coming to life until autumn most years anyways. Don't despair, there IS a railroad under there somewhere. And it should look better from now on because I took time to "redo" so many things that had gone wonky in the eleven years since I laid that first railroad tie. Looks like another good year for a "cold-weather" open house. If you think you might be coming through southwest Ohio and you want to stop by, or if you want to be put on our mailing list for future open houses, please contact us and let us know. Here's hoping you have many great days outdoors in your near future, Paul Note: If you arrived at this article by clicking on the "Next" link in our New Boston and Donnels Creek series of chronological articles about our garden railroad, you can continue the series using the links below.
Previous - Return to our article "April, 2010: Landscaping Rehab and Idiot Tools," which describes big maintenance tasks we had to perform eleven years into our railroad's life span. Some of them were caused by my mistakes, some of them were caused by following bad advice from "experts," and some of them were caused by a neighbor's use of the cheapest possible materials in his privacy fence. Note:The following articles are listed in reverse chronological order, so if you want to start at the beginning and work your way through, please jump to the "About New Boston and Donnels Creek" article near the bottom of this list. Return to our article "2009 Christmas-Themed Open House on the NB&DC," which presents the rest of our plans and preparations for our 2009 Christmas-themed open railroad, as well as a description of the day itself. Previous - Return to our article "Fall Has Fell," which outlines our early plans for our 2009 Christmas-themed open railroad. Return to our article "Refurbishing Garden Railroad Track." Return to our article "Planning a Christmas Open House, Part 5." This is the last in a sequence of articles that describe our preparation and eventual execution of our first Christmas-themed open railroad in 2008. Return to our article "Planning a Christmas Open House, Part 4." Return to our article "Planning a Christmas Open House, Part 3." Return to our article "Planning a Christmas Open House, Part 2." Return to our article "Planning a Christmas Open House, Part 1." Return to our article "Refurbishing Garden Railroad Roadbed," which describes how we used cement roadbed to addressed the massive burrowing animal and weed growth problems caused by following the track-over-gravel-on-a-dirt-pile instructions of the desert-dwelling garden railroad experts and GR editors. Return to our article "About the Owner/Author/Lead Editor," which describes Paul's circumstances and approach to garden railroading in the early 2000s Return to our article "NB&DC Rolling Stock," which lists the sorts of cars I was running on my railroad in the early 2000s. Return to our article "Motive Power, which was written in 2003, and updated in 2008. It describes the locomotive we were using most of the time to pull trains on the New Boston and Donnels Creek. Return to our article "June, 2003 Photos, to see what our railroad looked like four years after we broke ground, and one year after the 2002 convention. Return to our article "Layout So Far," which describes the track plan, plants, etc. of our garden railroad as of the early spring of 2003. Return to our "January, 2003" article, which includes photo of our railroad caught in a 6"-8" snow right after running trains at Christmas. Return to our "June, 2002 Photos article, which contains photos of our garden railroad as it was set up for the 2002 National Garden Railway Convention in Cincinnati. Return to "What to Do When a Tree Eats Your Railroad." To return to our article "Stress Testing on the NB&DC RR," click here. To return to our NBDC 1998-2000 Pictures page, click here. To return to Landscaping and Pond Construction, 1998-1999, click here, To return to our page About New Boston and Donnels Creek" click here. To return to the New Boston and Donnels Creek Index Page, click here To return to the Family Garden Trains Home Page, click here
|


|
Reuse or republication without prior written permission is specifically forbidden. Family Garden Trains is a participant in the Amazon Services LLC Associates Program, an affiliate advertising program designed to provide a means for sites to earn advertising fees by advertising and linking to amazon.com. For more information, please contact us |
 |  |
| Visit related pages and affiliated sites: | |||||
| - Trains and Hobbies - | |||||
|  |
|
 |
|  |
 |

|

|  |
|

|
| - Christmas Memories and Collectibles - | |||||
 |

|
 |

|

|
|
| - Family Activities and Crafts - | |||||
 |

|

|

|

|

|
| - Music - | |||||

|
 |
 |

|

|

|

|

|

|

|

|

|

|

|

|

|

|

|