| |||
|
 |  | |
 |  | ||
 |  | ||
 |  | ||
 |  | ||
| |||
|
|
| | |
| | ||
| | ||
| | ||
| | ||

12 Volt Street Lamps from Specialty Light StrandsStreet lamps made for large scale have always had two problems:
Yes, they are charming and effective as far as they go. But the solar lamps are still too big and don't stay on long enough when the days get short. And the Lionel-style lamps have to be fastened to something, plus they're a bit small for some of my settings. (And they yellow, which can be tempered with some Indoor-Outdoor UV-resistant spray). This article describes a series of attempts to make useful, inexpensive lamp posts for outdoors, starting with a dime-store Buying the Lamp Fixtures
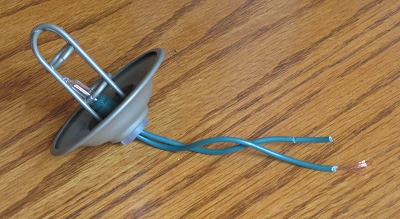
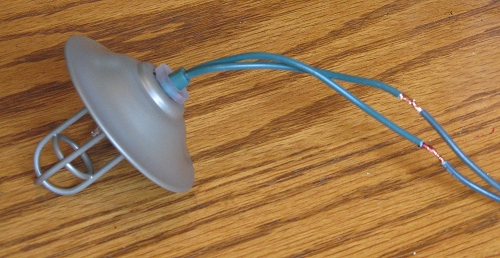
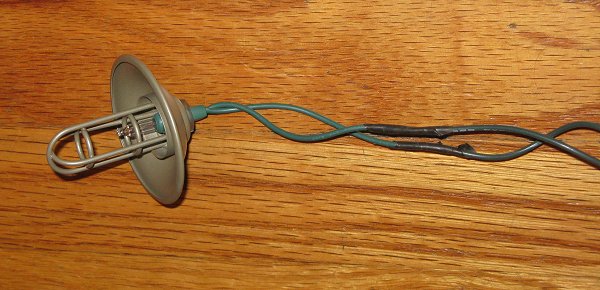
These sets were made to go outside, at least temporarily. Because they came ten "lamps" to a 120-volt strand, each "lamp" would handle 12 volts, the same voltage produced by my low-voltage garden lighting sets.
By the way, each package was $10, with ten lamps to a package. So the cost of each lamp would be only $1 plus the cost of whatever other materials I needed to buy to make my project work, a pretty good deal compared to buying ready-made lamps. Now all I needed was some sort of lamp-stand. Because the wiring fed into the lights from above, it seemed like I would need a "U"-shaped stand, rather like a candy cane. But what to use? I ran out of time to work on the project then, so I posted a couple notes and photos in my April newsletter, then put the whole works back into the box for a few months while life happened In the middle of a ridiculously busy summer, l did squeeze in a few attempts to find a good method for making the "candy canes." These largely involved trips to various hardware stores trying to find something that "registered." On two different trips to two different "big box" chain stores, the obvious new hires working the plumbing aisles told me "we've never had anything like that;" in both cases, I found what I was looking for later in the same store, when I went in for something else. You gotta love'em! Researching Copper Tubing
Sadly, the results were not impressive. It's hard to get tight, even curves, much less cosmetically impressive ones.
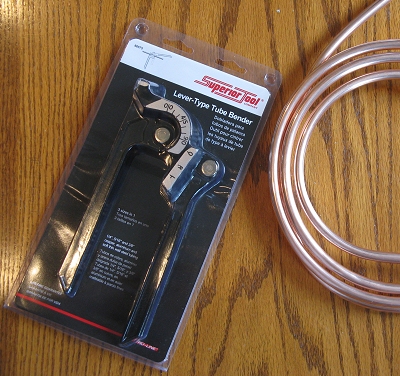
The resulting bend I then investigated several styles of "Lever" Tube Benders." These cost from $26 to $50, which would seriously kick up the price tag for my project. But I finally figured it was worth taking a chance - after all I could always pretend that the tool would come in useful for something else some day. I found a "Superior Tools" bender at Lowes for $26.43. It was in a dust-filmed The roll of copper was in the $4 range. I had already ruined about 14" of it trying to use the spring bender, but I figured I had enough tubing left for another five attempts. Assuming I bought enough copper tubing to do all 20 lamps this way, the cost of the project would be about:
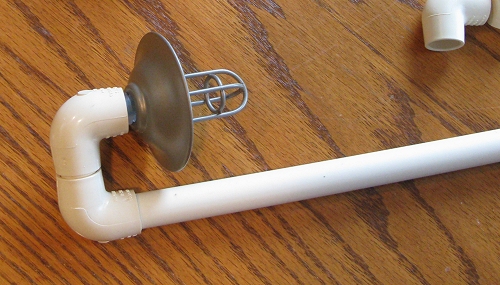
So for a club or a very large layout, the cost of the tube bender would eventually be recouped. But if I was only doing ten lanterns this way, the result would be $5.30 a lamp - still a savings over buying pre-fabricated lamps, but not necessarily a no-brainer. Researching PVCTo find a cheaper alternative, when I picked up the bender, I also visited the PVC aisle. The smallest configuration I could find that had all the parts I needed was 1/2" OD PVC. I bought a 5' long piece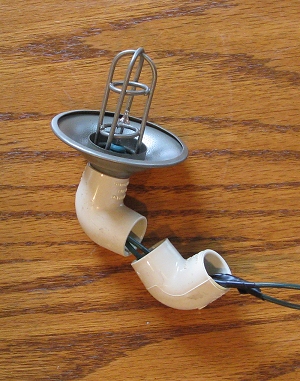 of piping for .28 a foot. (The "pipe" costs more if you buy it in smaller sizes.) Each candy cane would take two "elbows," which were .26@. The photo to the right shows me trying the elbows out with a utility lamp fixture to see how long a connecting piece I would need. (The answer was less than 1".) of piping for .28 a foot. (The "pipe" costs more if you buy it in smaller sizes.) Each candy cane would take two "elbows," which were .26@. The photo to the right shows me trying the elbows out with a utility lamp fixture to see how long a connecting piece I would need. (The answer was less than 1".)
Assuming I could get four lamps' worth of material out of each five-foot pipe section, this would change the cost of the project as follows:
So I bought enough PVC elbows to make four lamps.
Soldering the Lamp WiringNote: The last time I mentioned soldering in one of my articles, I discovered that many of my readers have never held a soldering iron, and a few thought it sounded too dangerous or "geeky." But soldering is actually pretty easy and can help you pull of some rewarding projects. So for the sake of my less-experienced readers, I'm going to much more detail on this step than some of you will need. I am, however, going to leave out all of the "official" instructions for using a soldering iron that don't really help in the long run. If you're already an experienced solderer, feel free to skim. Or read it carefully and tell me what I'm doing wrong. :-)This section assumes a low-wattage (30-40-watt) iron, the kind I "grew up" using on electronic circuits and small models. It also assumes 60/40 rosin-core solder
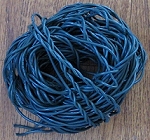
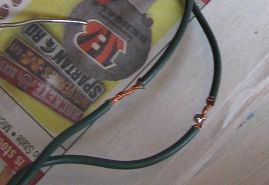
Cut the Long Wires - Since I was experimenting and didn't know how long I would need the wires to reach between the lamp posts and the garden lighting wires, I cut each "long wire" about 3' long. If you know you're going to be wiring them closer than that, remember to compensate for the 14"-16" length of the candy cane, plus how far the end will be shoved into the ground. Unless you're paying a premium for wiring, you're better off going long than too short. Prepare Your Low-Voltage Soldering Iron Your soldering iron not only has to be hot - it also has to be able to transfer heat. If your soldering iron has been used a few times, consider using a fine sandpaper or sanding block to sand the tip clean before your next soldering attempt. Some folks also use a trick called "tinning," which involves melting a little solder on the tip of the iron before you start. If you're using a low-voltage soldering iron, plug it in at least ten minutes before you plan to start using it (I usually go twenty). Put it where you won't accidentally bump it or the cord, but where you can keep an eye on it. If it starts smelling hot, that's good. Once your soldering iron has been plugged in for more than a minute, be certain to grasp it only by the handle, and never try to pick it up while you're looking the other way or holding something awkwardly in your other hand. Strip the Wires - Using a pair of sharp scissors or a knife, put a notch in the insullation about a half-inch from the end of the wire. Until you get a "feel" for this, you might want to go gently, maybe putting two light notches on opposite sides. You're trying to make the insulation weak enough to pull apart at that point when you put pressure on it, not necessarily to cut all the way through all the way around, which would be very time consuming. You can buy special tools for this, by the way - I just got used to stripping wires in the "field" with whatever was handy.
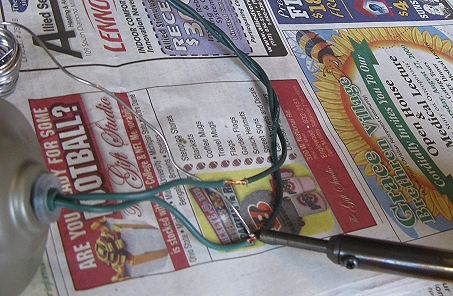
Solder the Wires - Spool out a few inches of the solder without breaking it off. Rosin core solder is hollow in the center; it contains a chemical "flux" that helps the wires heat evenly as the solder is flowing over them. Ordinarily when you use the solder, the end of the solder melts "shut," keeping the rosin from running out. If you break off a piece, you could lose your rosin before you use the solder.
Still, the heat transfer doesn't happen automatically. Press the soldering iron against the wires to be soldered. Then with your other hand, manipulate the solder strand so that the end of it meets the place where the soldering iron tip meets the wire. Note: In the photo above, you can see that I used several layers of newspaper to avoid burning my work surface, another bad habit I got into soldering "in the field" years ago. You should work on a tile or concrete surface, although a wooden workbench is usually safe. If you are using a high-wattage iron you must work on tile, stone, concrete, or the like.
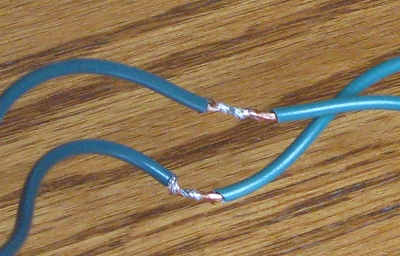
Don't Leave any Cold Solder Joints - Can you just re-melt the solder? In some cases, there's enough flux left to do the job, and when you reheat the wires and melt the glob, it does what it's supposed to the second time. If that happens, be especially careful to make certain that the "wicking" action has occurred and the final joint is shiny. If the second attempt doesn't product a shiny joint, I am likely to knock off the solder and start from scratch, though.
Make the Lamp PostsNow it's time to either bend or assemble the "candy canes" that will support your lamp fixtures.Bending Copper TubingAs I mentioned before, I had a number of false starts with this before I figured it out. If you've picked up a lever-style tubing bender or borrowed one from a plumber friend, this method should work for you.
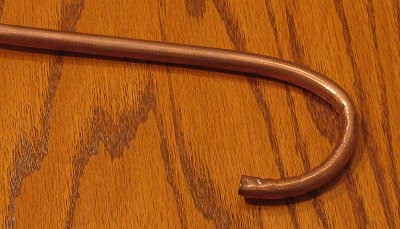
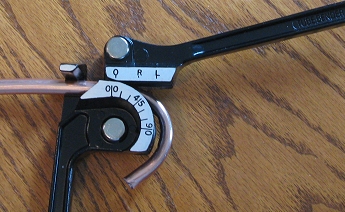
My copper tubing came curled up, so I straightened it out for a few inches before sticking it into the bender. Since you want the curve to come up almost to the end of the tube, stick the tube into the bender in the way I show in the photo to the right. Make certain it is in the correct "track," then bring the lever around - you'll put a nice bend into the tube. I was a little disappointed that the inside of the curve buckled a little and the outside flattened out a little. Maybe I should dig up that spring thing and try using them both at once. Still, once they're painted and in position, you hardly notice, so it's not a "deal-breaker" like the results of using the spring by itself.
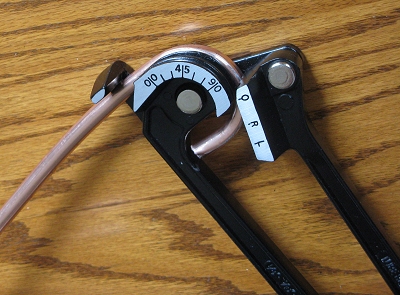
The next photo shows the result after the third bend. When I over-bent my post, I then measured so that the whole piece would be about 14" high and hacksawed off the other end. Then I tried to straighten out the "straight part" as well as I could, rolling it back and forth on the table like a child making clay snakes, but with more pressure. To get rid of the inner "burrs" that could slice up my wires, I stuck the end of my needlenosed pliers into the openings and twisted it back and forth like a ream.
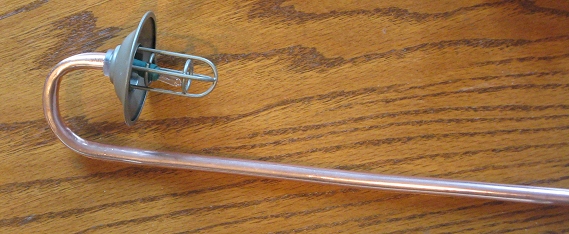
Once I felt like I knew what I was doing, the rest of the copper lamp posts went pretty fast.
If I was doing this for permanent display, I'd have sanded out the "writing" on the outside of the elbows. But this was a "proof of concept," and if I got bogged down in details, I'd never have a finished project in time to publish this article. So I took the minor precaution of turning the lettering end "down" so it didn't show on the very top. A bigger problem was the "stickum" from the price labels I peeled off. Though I tried scrubbing it off with mild solvents, I had more success buffing them off with an old T-shirt.
I figured I had too much linear PVC for four lamp-posts, but not enough for five, so I might as well cut four. I made certain I had four 1" pieces, and divided the rest into four pieces. I pressed the PVC lamp posts together (don't glue them yet), grabbed several of my favorite paint colors, and headed outside.
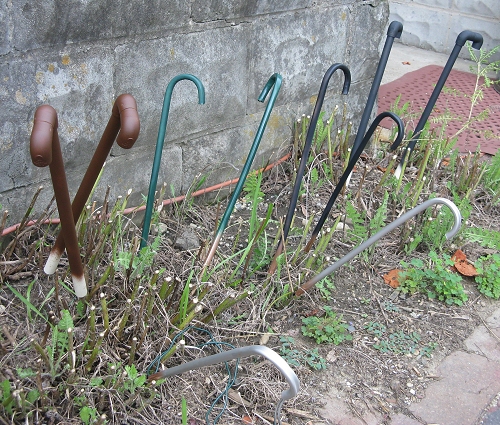
The candy canes needed to dry in an upright position, of course. And I had recently trimmed my t\yarrow patch almost to the ground. So I figured they could sit on the "stumps" until they dried. I wasn't going to take a photo of this, but when I went back outside, it struck me as pretty funny-looking, so here it is. "Whatcha growin', there, Paul?"
Before I install the lamp posts permanently, I will also coat the finished fixtures with uv-resistant indoor-outdoor acrylic spray, to protect them from rust and UV. That will make the "glass" on the lantern-style fixture look "frosted," but it will also slow down the yellowing process.
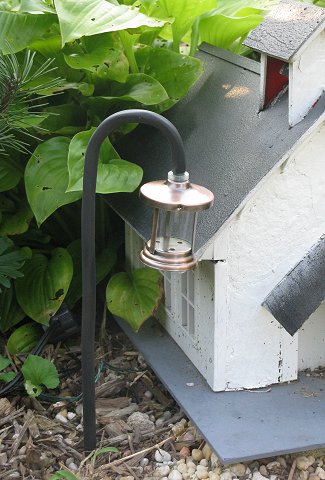
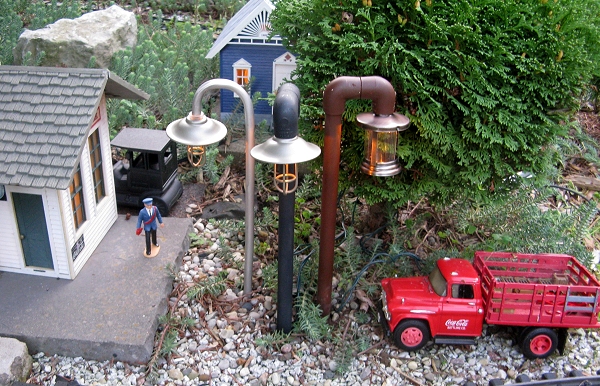
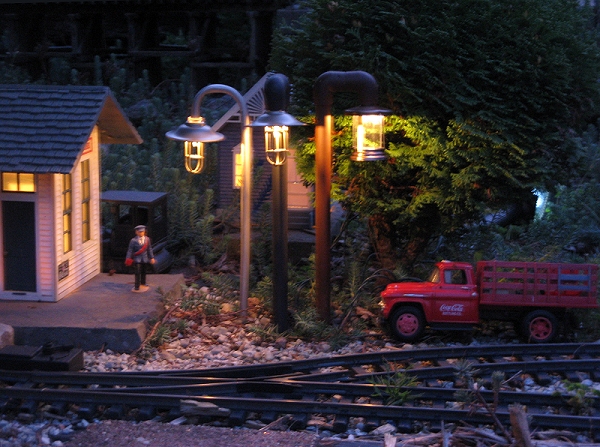
I took the photo in the middle in late afternoon, just after the garden lighting system that illuminates my structures came on. I waited a little later to take the photo on the right, so you get an idea how the fixtures illuminate the scene.
My overall conclusion is that the PVC version is way easier and way cheaper, but the copper tube version is more elegant. Also, I think that the utility-light fixture suits my early-to-mid-1900s railroad more than the lantern-style fixture. That said, the lantern style fixture could be very useful on an 1800s-era railroad, especially in larger scales like 1:20.3 or 1:13.5. I'm sure that folks who model in these scales can figure out ways to make the posts look more appropriate. Building up hollow "beams" from strip wood, so the wire can be hidden, might be one solution.
Since I've already paid for the tube bender, I may just check to see if Wal-Mart is closing out the utility-light versions yet, pick up a few more packs, and "go to town." Other uses for these occur as well, such has having them stick out of building walls over warehouse doorways and the like.
And other fixtures may come along next at Christmas season or next spring that will be useful for this sort of thing as well. Just about any specialty light strand that has ten incandescent bulbs (not LEDs) can be used this way. The only additional thing to consider is that it is very hard to find 12-volt replacement bulbs for these strands, so you'll want to be sure you keep any extras on hand.
Finally, I've shown you my mistakes as well as my successes. When you try your own version of this project, please get in touch and let us know what works and what doesn't work for you.
Above all, enjoy your trains, and any time you have with your family in the coming months.
There is a trick for sharp bending of thin wall tubing without kinking. I learned the trick from a couple of old codgers that restored a very old antique car that included making a new radiator from scratch. They also owned a speeder and ran with the Speeder Club.
The trick is to fill the tube to be bent with molten lead. Let it cool and bend it as if it was a solid piece of wire. After the tube is bent the way you want it you can then heat it up to melt the lead out.
|


|
|
| 
|
 |
 |
|
 |
 |
Note: Family Garden Trains?, Garden Train Store?, Big Christmas Trains?, BIG Indoor Trains?, and BIG Train Store? are trademarks of Breakthrough Communications (www.btcomm.com). All information, data, text, and illustrations on this web site are Copyright (c) 1999, 2000, 2001, 2002, 2003, 2004, 2005, 2006, 2007, 2008, 2009, 2010, 2011, 2012, 2013 by Paul D. Race. Reuse or republication without prior written permission is specifically
forbidden.
Family Garden Trains is a participant in the Amazon Services LLC Associates Program, an affiliate advertising program designed to provide a means for sites to earn advertising fees by advertising and linking to amazon.com.
For more information, please contact us

 |  |