| |||
 |
 |
 | |
 |
 | ||
 |
 | ||
 |  | ||
 |  | ||
| |||
|
|
| |
|
|
| ||
|
|
| ||
| | ||
|
| | ||
Written by Paul D. Race for Family Garden Trains(tm)
 |
|
|
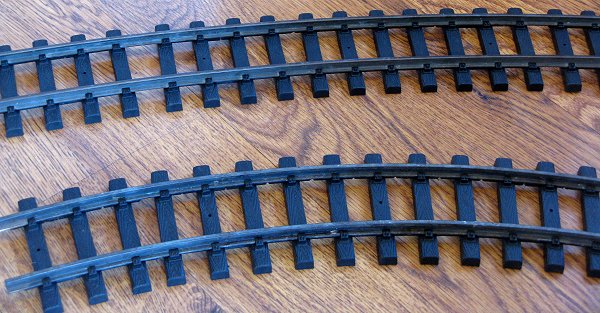
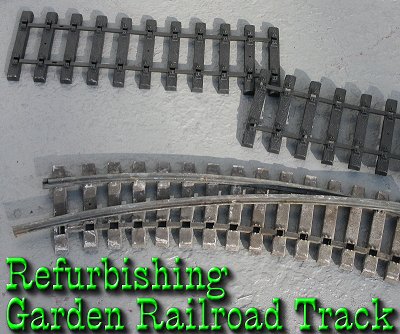
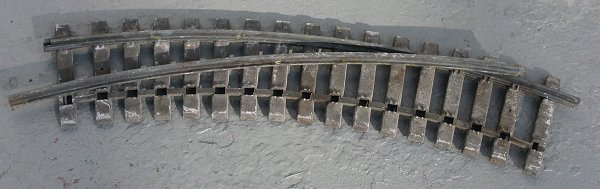
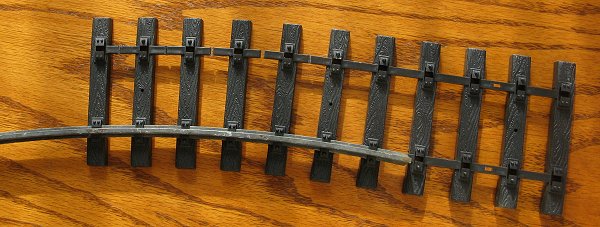
Refurbishing Garden Railroad TrackAs the cost of copper continues to rise, garden railroaders are looking for ways to cut costs, including ways to make the best use of their existing investment in Code 332 track (the kind LGB pioneered). Because the rails of the old track are so sturdy, they usually outlast the tie strips, the rail joiners, and even the roadbed they're installed over. The good news is that if you've got rails in good shape, you can usually make your track sections "like new" (or in some cases "better than new") for 1/3 or less of the cost of new track.Update for 2023 - In late 2013 AristoCraft went out of business. However, USA Trains track is identical except for the color of the brass when it's new. LGB's rail profile is also compatible with both, so if you have any of those brands, you might be able to find tie strips for your track - even if it's a different brand. Tie Strip Issues - Most often, when track fails, you'll discover that the culprit is the tie strip. Fortunately, though brass track is costing as much as $6 a foot in some markets, UV-resistant tie strips are available from companies like AristoCraft for a little over $1 a foot. Better yet, Aristo tie strips will fit most other brands of 332 rail very nicely. (Of course you're welcome to investigate tie strips from other manufacturers.) Rail Joiner Issues - Some times the rail joiners have also failed. Even if they haven't, if you find yourself rebending rail or replacing ties, you should think about replacing any that are getting "dicey." Also, if you've only used slide-on rail joiners in the past, this could be a good time to consider screw-on aftermarket joiners. Or if you have Aristo track, and the old rail joiners are getting a bit "sloppy," consider on replacing them when you replace the ties. Symptoms of Failing Tie Strips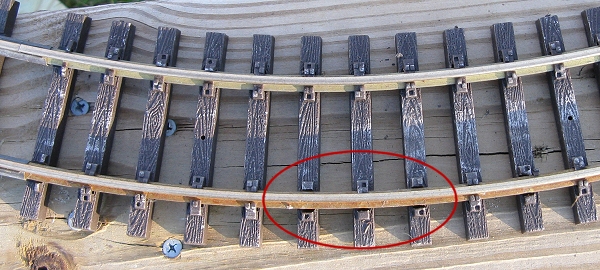 In some cases, you can tell that a tie strip has gone bad because the rail is simply pulling away from the ties. In other cases, the symptoms are more subtle. You may have a bit of track that certain cars or locomotives always hang up or derail on. The track section shown at the right is from my portable Thomas railroad. This track section used to derail Annie and Clarabel, but not Thomas or James. In fact, heavy trains of any sort ran fine. In some cases, you can tell that a tie strip has gone bad because the rail is simply pulling away from the ties. In other cases, the symptoms are more subtle. You may have a bit of track that certain cars or locomotives always hang up or derail on. The track section shown at the right is from my portable Thomas railroad. This track section used to derail Annie and Clarabel, but not Thomas or James. In fact, heavy trains of any sort ran fine.
When I was setting up the portable railroad most recently, I noticed that the outside rail had too much inward flex because a few of the plastic "tie plates" had given way. Rolling stock that was too light (like Clarabel) wouldn't put any "outward" pressure on the track as it passed. Replacing this track section "fixed" that part of the railroad in a hurry. On the other hand, I still needed to "fix" that piece by installing a new tie strip.
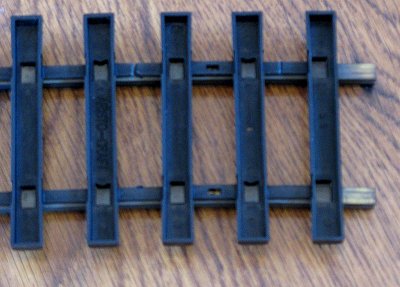
About Rail CodesWhen LGB reinvigorated garden railroading, they introduced a rail profile that was oversized but which could handle almost anything that would happen to it in your back yard (except maybe a low-cutting lawnmower). Code 332 rail is about 1/3" high. Almost all Code 332 rail made for garden trains since has followed the LGB profile. So replacement tie strips from LGB or AristoCraft will work with just about anybody's rails. (Bachmann, Lionel, and Gargraves Large Scale track don't count, since none of them use solid code 332 rails.)Llagas Creek, AMS, and a few other manufacturers have used Code 250 rail (about 1/4" high). Most Code 250 Large Scale track hasn't been around long enough for the ties to fail. However, when that does happen, consider getting replacement tie strips from the original manufacturer, or trying a sample before you buy a bunch - I'm told that not all Code 250 track follows the same profile. As an example of options available for replacing the tie strips for Code 332 rail, here's a table of AristoCraft's tie strip products and their last advertised "list prices." Yes, we know they're not available new any more, but it might give you an idea of what you're looking at, if any of the products below turn up.. Again, tie strips for LGB or USA Trains, or the discontinued Bachmann brass track should all be compatible, except for the tie width.
Removing Rail JoinersMost garden train track has slip-on rail joiners of some kind, but sometimes getting them disassembled from the rail is more complicated than you might think.
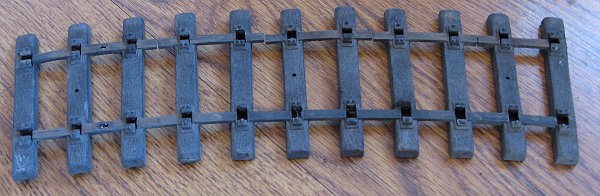
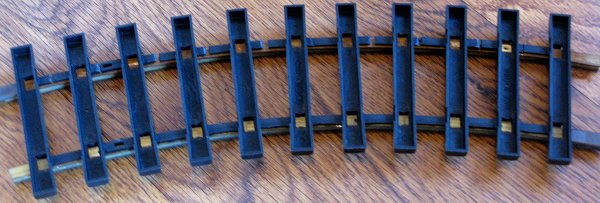
Examining Old Tie StripsSee if there's anything peculiar about the existing tie strips. For example, some rail joiners have a little tab that goes down into the tie to keep it stable, which means that when you reassemble the track, you'll need to put that rail joiner in place before you slide the rail all the way through.Aristo Track has screws on the bottom of the tie strips which help keep the track stable. On 1' pieces this isn't a problem - you'll just make certain to slide the new tie strip on. On longer pieces, like the pieces for the 10'-diameter circles, you actually need about 2 1/2 strips per piece. To remove the tie strips, you'll need to remove the tiny Phillips-head screws in the bottom, but to to restore the track piece to optimum condition, you need to turn the strips so that the holes for the little screws align and you can put the screws back in place. In the piece shown below, using Euro ties, you slide two full tie strips onto the rails, then a partial tie strip. What do you do with the other ties that you cut off the partial tie strip? Well, I always have some odd pieces from other brands laying around that need new ties, too. 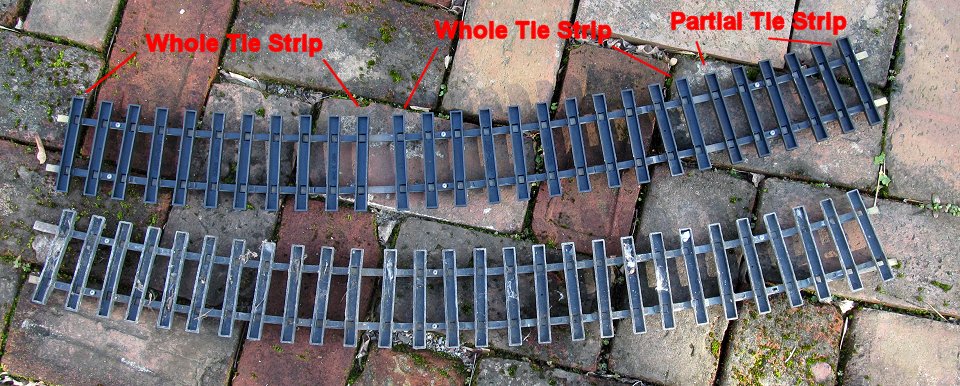 Removing Tie StripsBy now your rails may have just pulled out of tie strips. But if they haven't, pay attention to which rails are the "outside" and "inside" rails. In fact, I like replacing tie strips on one piece of track at a time so I don't get confused on the really broad curves, where it's harder to tell the difference (but I'm easily confused, so this may not apply to you).
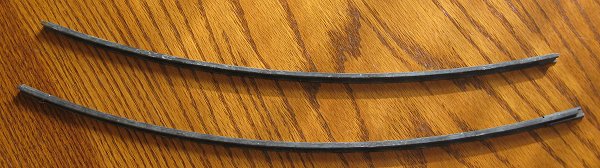
Again, be careful to protect the rail's shape when removing the tie strips or storing the rails. Code 332 brass rail can be bent into a shape that's hard to fix if you're not careful. Check the Rails' Shape
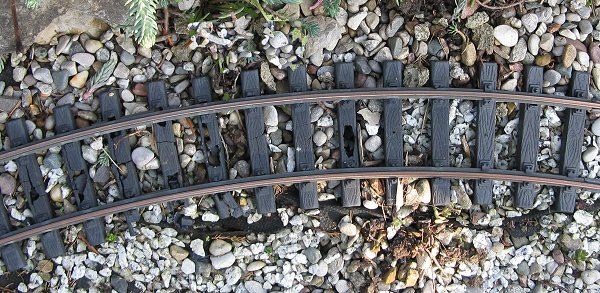
I don't recommend cleaning your rails up any more than necessary because you lose that cool brown color they've faded to. It took years of Ohio acid rains to get my rails to achieve the great dirty brown color you see in most of photos. Why go back to shiny brass? You also risk bending the rail into an unfixable shape if you're handling it roughly. Sometimes, though, a rail may be so corroded that you are afraid you will have trouble getting the new tie strip on. In such a case, you can use a very fine sanding pad or something similar, and use it as gently as possible. Again, be very careful not to bend the rail in any direction as you do this. Replacing the Tie StripsBe certain that you have keep the "inside" and "outside" rail straight.
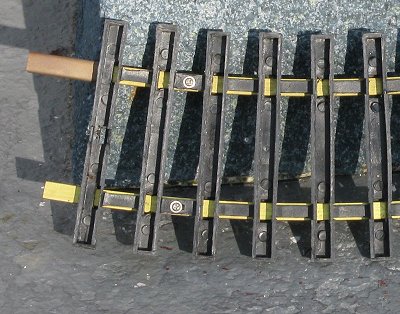
Look at How the Original Tie Strip was "Nipped." Aristo tie strips and several others come with connecting pieces on both ends of each tie, like little ladders. That's great if the track is straight. But if your track is curved, you'll need to nip some of the connectors on the outside edge.
If you ordered Aristo replacement ties for 48"-diameter curves, those don't need to To do the nipping, I used a wire cutter - although you could use a knife or something else just as easily.
In most cases, I ran both rails through the tie strips at a time, once I got them started. If you are using LGB rail joiners, they have to go in as you replace the rail. Be sure you put them back the way they were before you took them off. If you have a track gauge, run it the length of the repaired length of the track. This will help you identify any places where the rail has been bent in such a way that the repaired track will be out of gauge. If you've treated your track carefully, this won't usually be a problem. But if the repaired track is seriously out of gauge, you may need to use a railbender to rebend one or both of the rails before reinstalling it on your railroad. If you don't have a track gauge, fasten a few pieces of track together and push a car over them to see if the car runs runs smoothly. Obviously, this is far more important for curves than for straight pieces. If you have track like Aristo that has tiny screws underneath, replace the screws once you've checked the track gauge. Replacing the Rail JoinersFollow the recommendations of the rail joiners' manufacturer. If you started with AristoCraft track (rails and all), your least expensive option will usually be to replace any worn or sloppy Aristo joiners with new Aristo Track Joiners.
Conclusion
I'd be delighted to hear anything you've done along this line, or any other maintenance tips you want to pass along to our readers. Please contact us with suggestions, corrections, photos, etc. And, above all, enjoy your trains, and any time you can spend with your family in the coming months. Paul Reader FeedbackJohn W. Armstrong, of Canton Michigan writes:I am writing this to comment on your article, Refurbishing Garden Railroad Track. I have been receiving your newsletter for a while and enjoy reading it. I built my railroad several years ago . . . . This past summer I started remodeling my railroad and realized that about 80% of my track needed rebuilding. Instead of buying tie-strips, I salvaged the brass, which is a combination of LGB, Aristo Craft, and Kalazamoo, and decided to hand lay the track using ties cut from composite decking material and stainless steel spikes from Sunset Valley. I picked up an inexpensive ring-roller from Harbor Freight Tools, and formed the rail to custom radii. The rail needed to be straightened after peeling off the old tie strips; it didn't just need straightening, it had kinks, dips, and twists that had to be removed. I have built one turnout from the instructions in Garden Railways, and plan to replace at least four more turnouts with hand made ones as I have time. I have enough track complete and installed to run my trains, although I have only worked on about 15% of the railroad. Next summer should see a big improvement on useable trackage. I am anxious to see how well the new track manages over the winter. The composite ties should hold up well on the ground. Note: If you arrived at this article by clicking on the "Next" link in our New Boston and Donnels Creek series of chronological articles about our garden railroad, you can continue the series using the links below.
Previous - Return to our article "Planning a Christmas Open House, Part 5." This is the last in a sequence of articles that describe our preparation and eventual execution of our first Christmas-themed open railroad in 2008. Note:The following articles are listed in reverse chronological order, so if you want to start at the beginning and work your way through, please jump to the "About New Boston and Donnels Creek" article near the bottom of this list. Return to our article "Planning a Christmas Open House, Part 4." Return to our article "Planning a Christmas Open House, Part 3." Return to our article "Planning a Christmas Open House, Part 2." Return to our article "Planning a Christmas Open House, Part 1." Return to our article "Refurbishing Garden Railroad Roadbed," which describes how we used cement roadbed to addressed the massive burrowing animal and weed growth problems caused by following the track-over-gravel-on-a-dirt-pile instructions of the desert-dwelling garden railroad experts and GR editors. Return to our article "About the Owner/Author/Lead Editor," which describes Paul's circumstances and approach to garden railroading in the early 2000s Return to our article "NB&DC Rolling Stock," which lists the sorts of cars I was running on my railroad in the early 2000s. Return to our article "Motive Power, which was written in 2003, and updated in 2008. It describes the locomotive we were using most of the time to pull trains on the New Boston and Donnels Creek. Return to our article "June, 2003 Photos, to see what our railroad looked like four years after we broke ground, and one year after the 2002 convention. Return to our article "Layout So Far," which describes the track plan, plants, etc. of our garden railroad as of the early spring of 2003. Return to our "January, 2003" article, which includes photo of our railroad caught in a 6"-8" snow right after running trains at Christmas. Return to our "June, 2002 Photos article, which contains photos of our garden railroad as it was set up for the 2002 National Garden Railway Convention in Cincinnati. Return to "What to Do When a Tree Eats Your Railroad." To return to our article "Stress Testing on the NB&DC RR," click here. To return to our NBDC 1998-2000 Pictures page, click here. To return to Landscaping and Pond Construction, 1998-1999, click here, To return to our page About New Boston and Donnels Creek" click here. To return to the New Boston and Donnels Creek Index Page, click here To return to the Family Garden Trains Home Page, click here
|


|
Reuse or republication without prior written permission is specifically forbidden. Family Garden Trains is a participant in the Amazon Services LLC Associates Program, an affiliate advertising program designed to provide a means for sites to earn advertising fees by advertising and linking to amazon.com. For more information, please contact us |
 |  |
| Visit related pages and affiliated sites: | |||||
| - Trains and Hobbies - | |||||
 |  |
 |
 |
|  |
 |

|

|  |
|

|
| - Christmas Memories and Collectibles - | |||||
 |

|
 |

|

|
|
| - Family Activities and Crafts - | |||||
 |

|

|

|

|

|
| - Music - | |||||

|
 |
 |

|

|

|

|

|

|

|

|

|

|

|

|

|

|

|
 LGB railjoiners slip together when you join the track. But each railjoiner has a tab that helps keep it and the rail it's attached to in place. Look for that tab before you try to pull the tie strip off the rail. My friend Ric Golding says "I have found the best solution is to drill out the dimple, bend the tab and pull joiner off with needle nose pliers."
 but it has taken more than one casual garden railroader by surprise, when they started to disassemble a circle of track, then realized that someone else had screwed everything together. Trying to pull such an installation apart by brute force will ruin the rails, so please resist the temption.
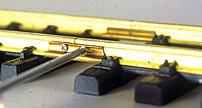
 On the other hand, if you have some other brand of track, you might consider a screw-on aftermarket joiner such as Hillman (shown at right) or Split-Jaw rail clamps.