| |||
 |
 |
 | |
 |
 | ||
 |  | ||
 |  | ||
 |  | ||
| |||
|
|
|
| |
|
|
| ||
|
| | ||
| | ||
| | ||
| Written by Bob and Pat Canfield for Family Garden Trains |  |

|
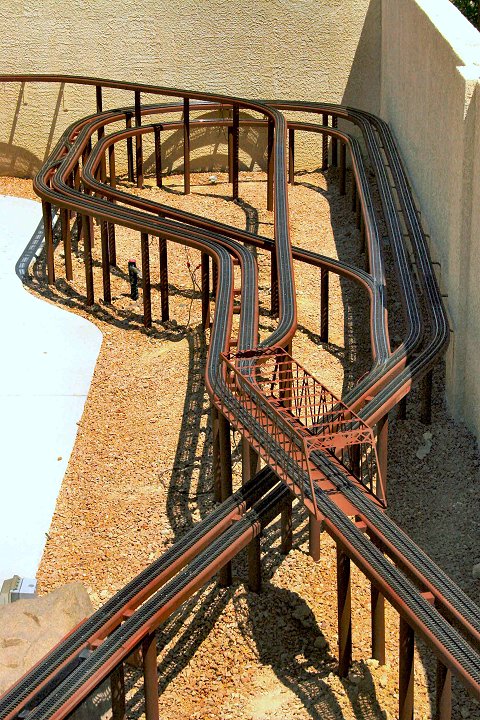
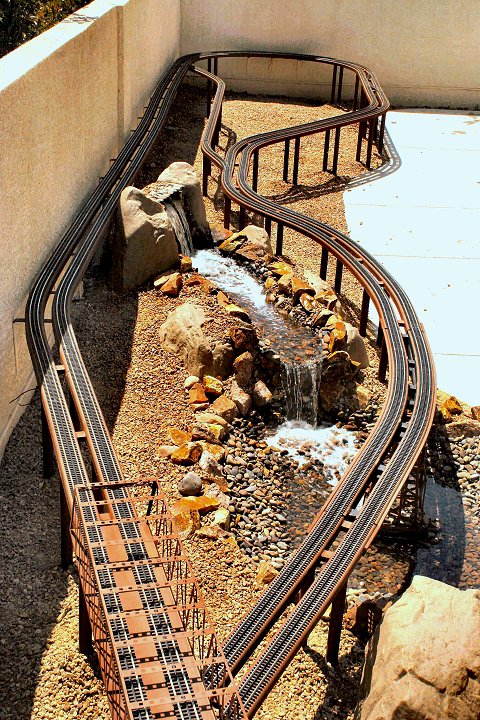
The B&P Garden Railroad (B&P) - Part 4 - Installing Atlas Nickel-Silver O-Gauge track on HDPE RoadbedNote: This is a follow-up to The B&P Garden Railroad Part 3. In addition, technical aspects of the following text will be best understood if you first read the Family Garden Trains Primer Articles regarding HDPE Flexible Roadbed by Paul Race, Bill Logan and Bob Zajicek. If you'll recall, we decided in 2007 to build an Outside O Gauge railroad, using a raised roadbed made from HDPE planks that are split and reassembled into a ladder-like framework (see Paul and Bill's HDPE Roadbed article for an overview). By the end of Part 3, we had the HDPE roadbed built, fastened together, and smoothed out.
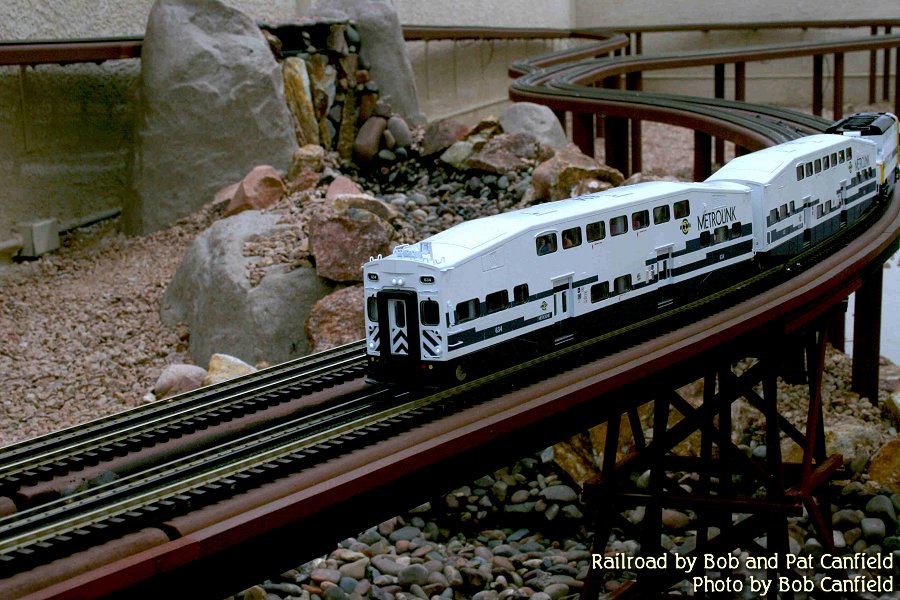
We applied power and TMCC to two adjacent tracks on the North end of the B&P, and, to our delight, everything, including all TMCC functions, worked correctly.
|
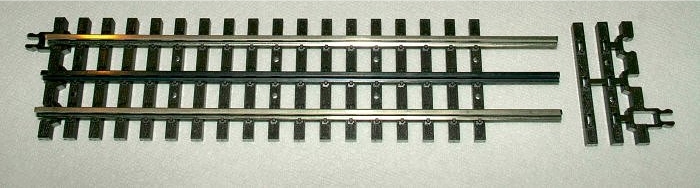 |  |
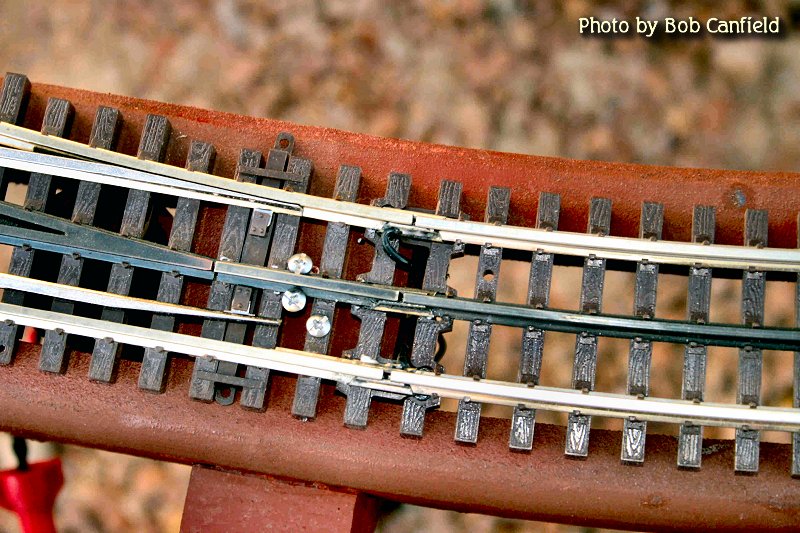
Do not buy Atlas O Scale Terminal Joiners for their Nickel Silver Slip Lock Track System. The Atlas Terminal Joiners are simply a pair of rail joiners, one standard color and one blackened color, with an approximate six-inch piece of black or red wire attached with solder. We initially purchased many sets of these, thinking we would use them approximately every ten feet of track for power connections.
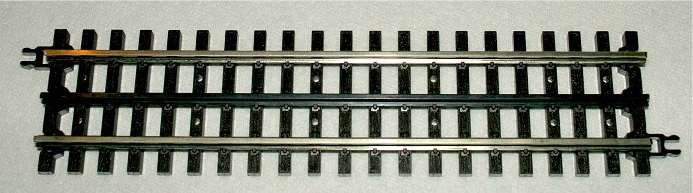
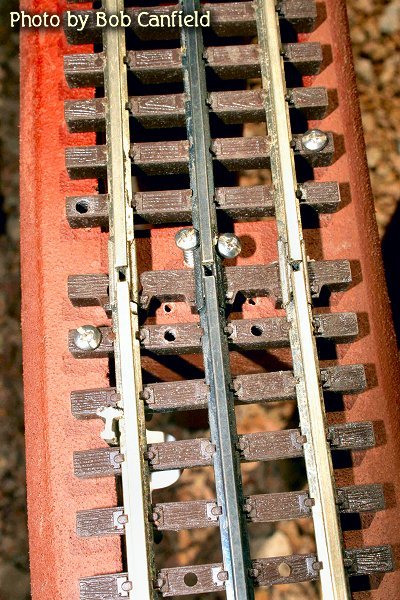
However, Atlas solders the respective wires to the bottoms of the rail joiners, preventing their use on the Atlas Slip Lock System�s outside rails. Subsequently, we purchased bags of Standard Nickel Silver Rail Joiners (16 per bag) and Blackened Metal Rail Joiners (16 per bag) and soldered our own wire to the appropriate places (bottom for center rail joiners, side for outside rail joiners). See the photos below.
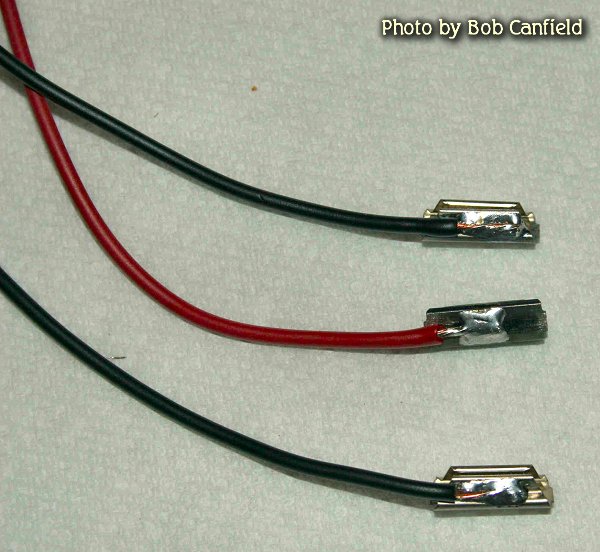 |  |
Even with the wire, solder and time spent, this is less expensive and more functional.
During roadbed installation we did not consider this a significant issue, because it was always our intent to use 40" sections of Atlas Nickel Silver Flexible Track for all curves. Therefore, we believed that we could compensate for any curve deviations with the flexible track.
We began our track laying efforts attempting to use 40" flexible track sections for all curves. However, the Atlas O Gauge Nickel Silver Flex Track proved to be more difficult to install than anticipated. After three days of frustrating work, we stopped construction to rethink our approach.
Thirty-five years ago, the last time Bob built a model railroad, he used HO flex track for a large indoor layout. Atlas� Nickel Silver Rail is a more rigid material than the brass used more than 30 years ago for HO flex. Also, O Gauge rail is physically larger, and combined with its three rails, makes the track significantly more rigid.
We found that if a curved portion of roadbed could be completely traversed with a single 40" section of track, it is relatively easy to obtain good results. However, if you needed to use five or six 40" sections of flexible track, joined end-to-end, to complete one continuous curve, as is the case for the B&P�s five 180 degree curves, smooth transitions from track section to track section are difficult to achieve. This is because the flexible track has a natural tendency to resist the curve and return to straight. We found ourselves wishing we had 12 foot long sections of flexible track.
We spent considerable time trying to identify a rail bending device suitable for the Atlas O Gauge Nickel Silver Track. With no success, in March 2008, we faxed Atlas a letter and asked if they could offer any advice or assistance. To date, Atlas has not responded.
We concluded that we would have to order Atlas Curved Track for at least the five lengthy 180 degree 072, 081 and 090 curves. Fortunately, we had not purchased enough track to finish the entire railroad, so the purchase of preset curved tack has not resulted in duplication or wasted track. Besides, as John Blessing pointed out, flex sections of track are often a better choice for �straight-a-ways,� anyway.
Taking a lesson from Fred Young and others, we have also removed all of the remote switch machines from our turnouts. We will operate all 14 turnouts manually with ground throws.
Some of our difficulties with installing Atlas Nickel Silver Flexible Track are associated with the open ladder-type roadbed design we are using. Flexible Atlas Track would be easier to work with if we had a solid roadbed on which to anchor it, e.g., a piece of plywood. With the HDPE�s open ladder design, the places where you can secure track ties to the roadbed are reduced by more than 60 percent. More important, if you are attempting to join two pieces of 40" flex-track in the middle of a curve, and you cannot secure the ties of the respective ends of each track section directly to the roadbed, achieving a smooth transition between the rails of the two pieces of track is very difficult.
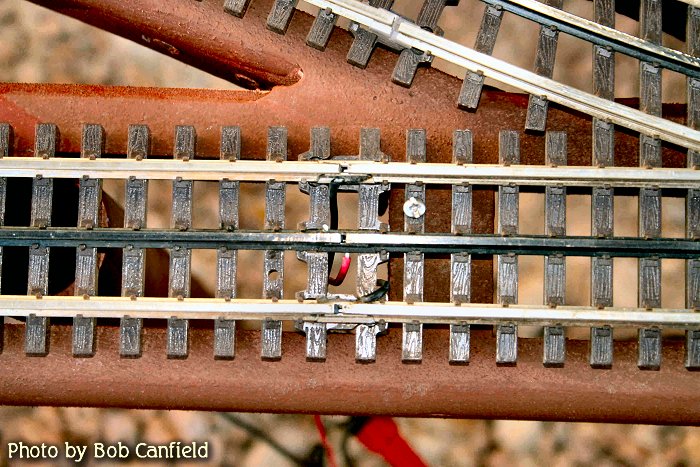
One solution we developed to counteract the rail�s tendency to bow out in a curve is the use of a short piece of scrap rail, notched at the top, and secured inside the roadbed as shown in the photos below.
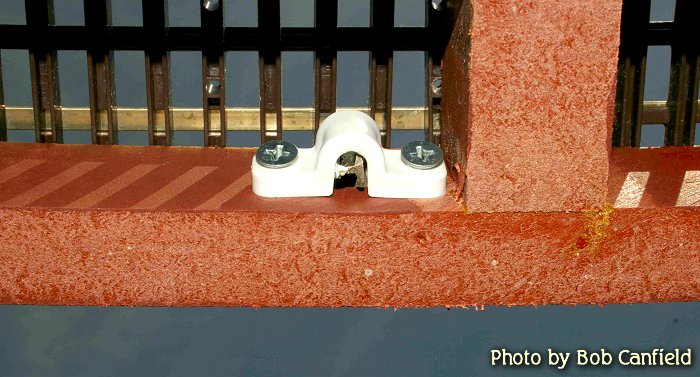 |  |
As noted above, we did not maintain �perfect� 072, 081 and 090 curves during roadbed installation. For example, a 180 degree, 090 curve would normally require eight Atlas 090 curved sections of track. However, when fitting the various 072, 081 and 090 curved sections to their respective roadbed, we found that it did not always fit because of our imperfect curves. Consequently, when we ordered our curved track sections, we ordered enough to allow some mixing of various curve sizes within the same curve.
For example, each of our two 180 degree, 090 curves have at least two pieces of larger 099 curve track, one leading into, and one exiting the curve. Additionally, each of the 180 degree, 090 curves have at least two pieces of smaller 081 curve track.
In the 180 degree, 090 example, to achieve the best fit of curved track to fixed road bed, we first laid out the eight sections of 090 track. If we found the roadbed curvature to be larger than 090, we replaced a piece of 090 with 099. Likewise, if the curvature was smaller, we replaced a piece of 090 with 081, and so on. The eight sections of track to achieve 180 degrees, might be in this order: 099; 090; 090; 081; 081; 090; 090; and, 099.
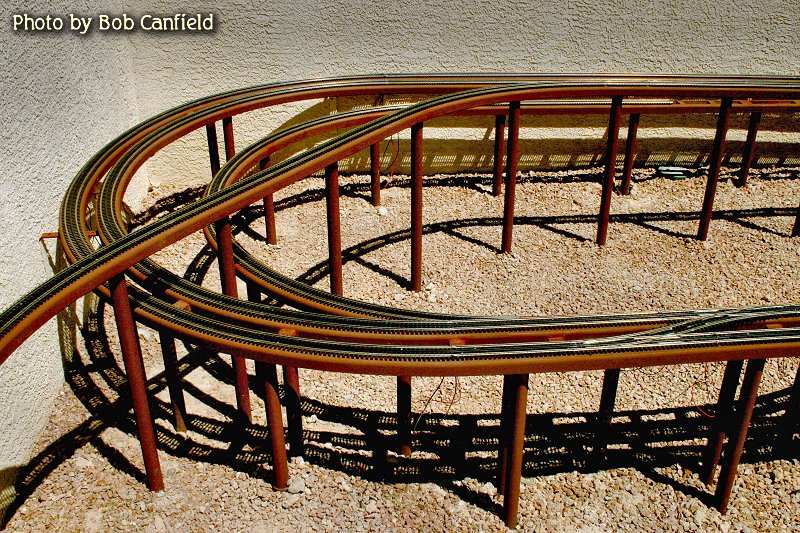
This process was repeated for each of the five 180 degree curves, two 090, two 081, and one 072. Once these pieces were laid out, Bob let them sit a day or two, then reexamined them, to satisfy himself that he had achieved the best fit of track to roadbed that he could. The photo below shows the results of this process.
John Blessing addresses this issue in one of his articles and stresses the importance of building your roadbed curves as precisely as possible. In our hot climate, the roadbed's curves would have been more rigid with a product like Trex (plastic and sawdust), than it is with HDPE (100 percent plastic). But that is hindsight.
If we were starting today, given what we�ve learned about the �flexibility� of Atlas O Gauge flexible track and the impact of very high temperatures on HDPE, we would likely use a Trex-type product instead of HDPE in our climate. However, if you follow Bill Logan�s original design (as we did), a Trex-type product will not work if your curves are too tight because it is less flexible. More flexibility can be achieved with Trex if you make the sides rails of the ladder structure thinner than Bill Logan�s design. However this introduces other strength issues.
All in all, as we have secured track to our HDPE roadbed, some of which has been in place for eight hot and cold months, we have found our �bench work� to be very sound.
Once we complete track installation and basic wiring, we plan to detail our track work with the installation of missing ties, painting of mounting screws, installation of turnout ground throws, etc. This will be followed by shrubs and the installation of the many, many dozens of trestle bents we purchased from Split-Jaw Products almost a year ago.
We do not underestimate the many wiring and TMCC challenges we face to wire the entire layout. And then, there is always the extreme heat and rail expansion and contraction issues. Ah, a railroader�s work is never done.
We hope our experience gives you some useful ideas and helps you plan your project more effectively. If we can answer any questions, please contact us through the Family Garden Trains Contact link. Just put the words "Questions for the Canfields" somewhere in your comments and Paul will forward them to us.
Sincerely,
Bob & Patricia Canfield
Las Vegas, Nevada


| 
|
 |
 |
|
 |
 |
Note: Family Garden TrainsTM, Garden Train StoreTM, Big Christmas TrainsTM, BIG Indoor TrainsTM, and BIG Train StoreTM are trademarks of Breakthrough Communications (www.btcomm.com). All information, data, text, and illustrations on this web site are Copyright (c) 1999, 2000, 2001, 2002, 2003, 2004, 2005, 2006, 2007, 2008, 2009, 2010, 2011, 2012, 2013 by Paul D. Race. Reuse or republication without prior written permission is specifically
forbidden.
Family Garden Trains is a participant in the Amazon Services LLC Associates Program, an affiliate advertising program designed to provide a means for sites to earn advertising fees by advertising and linking to amazon.com.
For more information, please contact us

 |  |