| |||
 |
 |  | |
 |  | ||
 |  | ||
 |  | ||
 |  | ||
| |||
|
| | |
| | ||
| | ||
| | ||
| | ||
| Written by Mike Moran for Beacon Hill Trains(tm)
|
|
|
Mike Moran was the proprietor of Beacon Hill Trains, located in Downingtown, PA. He specialized in RC conversions, sound installations, and detailing and weathering of large scale trains. This article was originally published in the member newsletter of the South Eastern Pennsylvania Garden Railway Society, of which Mike was a supporting member. It is republished with permission. Basic Weathering With Powders
|
 |  |
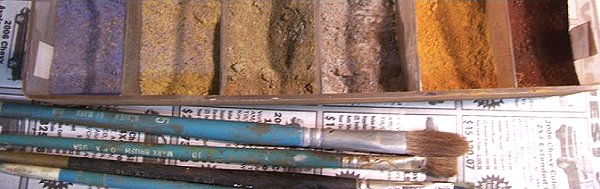
Below is a closer look at the powders.
 |
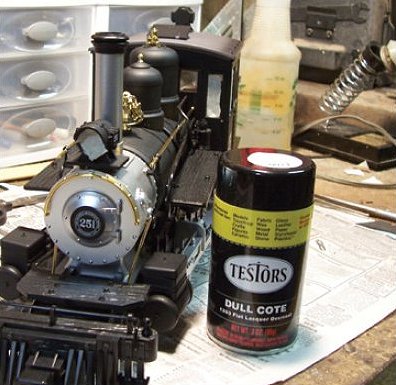
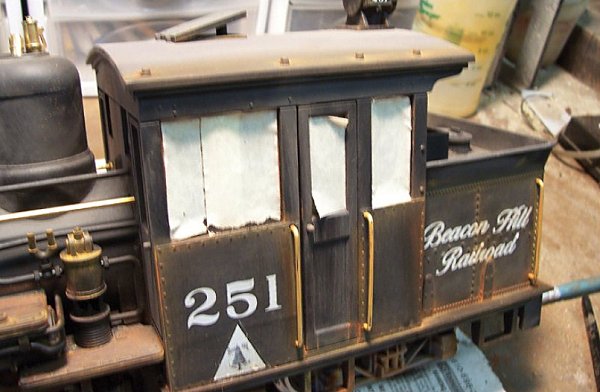
First if you are doing anything with windows (or some part you don�t want dull) you will need to mask them off because the spray will frost the glass.
In the next step you will need to spray the piece you are working on with the dull coat spray and let dry.
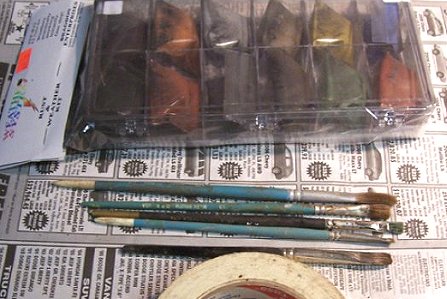
By this time you have made your decision on how weathered you want for your piece. I am going to proceed from here telling you how I did mine. You can put on as much or as little of the powder as you like. Before you start put newspaper down on your work surface. You will notice that as you apply the powders that some will fall to the work surface. This can be collected and reused later. Put the used powder in new container as the mix of colors will make a brown that can be used as a dirt color. Also if you have an apron use it, if you get it on your cloths it can stain them. Let�s get started!
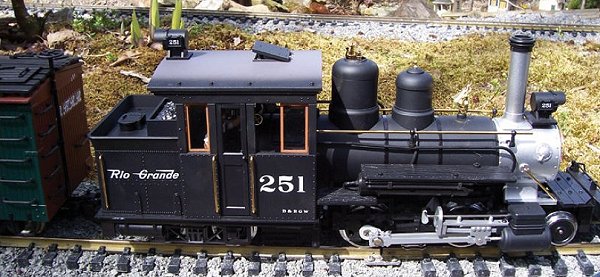
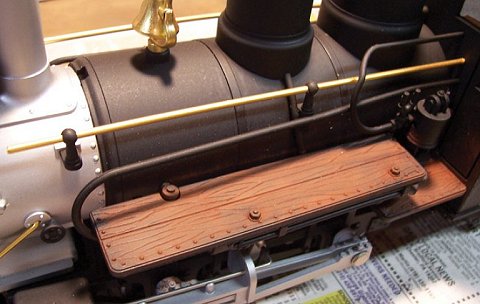 I started with the "wood" running boards on each side of the boiler, as photo below shows.
Using the dark rust, I took my brush, dipped it into the powder, tapping the side of the container to shake off any loose powder, and applied it to the wood areas, with a rubbing motion in the direction of the wood grain.
I started with the "wood" running boards on each side of the boiler, as photo below shows.
Using the dark rust, I took my brush, dipped it into the powder, tapping the side of the container to shake off any loose powder, and applied it to the wood areas, with a rubbing motion in the direction of the wood grain.
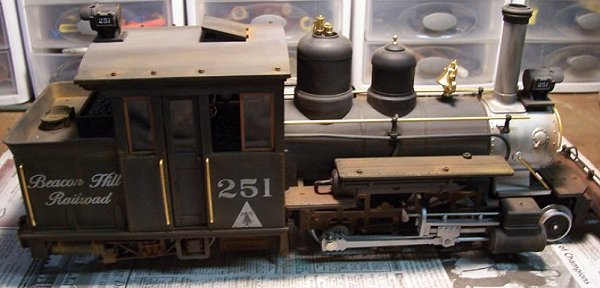
Next I started on the main body. At this point you will be applying several layers of colors, so start with lighter colors first. It is easier to cover lighter colors then it is darker ones.
 I started with the boiler but you can start anywhere you like on the engine. Since I wanted the engine to look as if it is used and worked hard, I started with ash as a base coat on all the black areas. The next color was a slightly darker color - grimy grey. I used it to make a shadow effect along the bands on the boiler and other areas as appropriate. All coats are applied the same way, with a rubbing motion so you can work the powders into the pieces. The rubbing causes the agents in the powders to adhere were applied.
You can stop at this point if all you want is a piece that has been in service for a short time and is just dirty. Adding darker colors on places coming down from roof tops will show dirt runs from when it rained. This is good if you are doing box cars or buildings. Some of the same techniques for applying color with an air bush can be done with the powders instead.
Next, if you are going to make it look older, I suggest some rust effects. Here again, start with lighter colors.
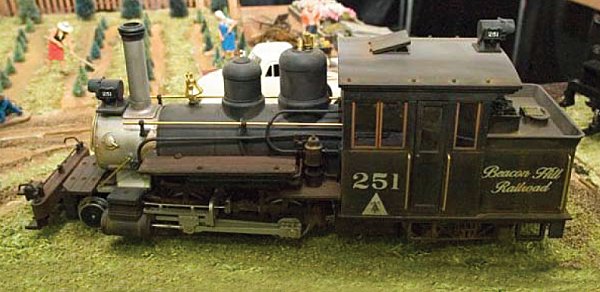
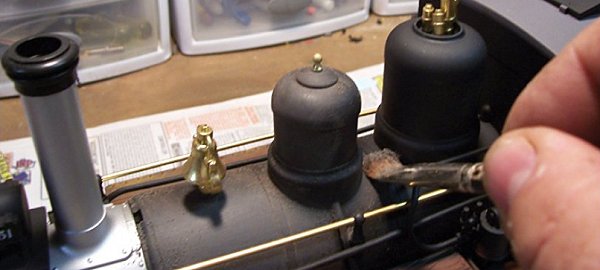
 In picture to the right, you see rust applied to the water pump and cab. I applied it to the rivets and other metal pieces. Start with light rust then medium rust. If you want darker you can use the dark rust color but be careful. Too much will cover the lighter colors completely.
At this point I went over the entire engine to see what I might have missed. Look underneath the engine, and don�t forget the trucks, springs piping and couplers.
If you feel you added too much rust, since the engine is black you can go over these areas with the black to cover some of the rust. Black can also be used on lighter colors to show dirt and aging. I have used blue, yellow and green powders on same color cars to make shadows.
When you are finished, remove any masking tape you used.
Go ahead and give it a try!
Please contact Paul with suggestions, corrections, photos, etc.
And, as Paul would say, enjoy your trains, and especially enjoy any time you have to spend with your family in the coming season.
 Now you are finished weathering the engine. You do not have to spray, as the powders seal themselves. Most sprays will hide all your work. If you need to spray, a product from Krylon called Workable Fixative can be used. Use caution with the spray, as only a very light coat is required.
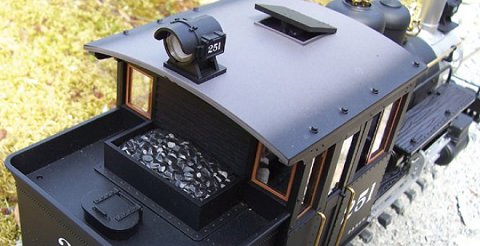
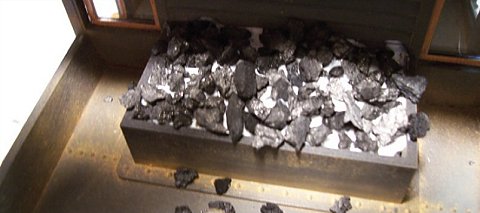 I then took some aquarium charcoal and mixed it with white glue and applied it to the coal area. (The glue dries clear.) This will make it look like a real coal load. The aquarium charcoal is just the right size.
Conclusion
These are the basics for using powders. I have applied my past experiences using chalks to do some more advanced techniques using powders to get some more desired effects.


| 
|
 |
 |
 |  |  |
Note: Family Garden TrainsTM, Garden Train StoreTM, Big Christmas TrainsTM, BIG Indoor TrainsTM, and BIG Train StoreTM are trademarks of Breakthrough Communications (www.btcomm.com). All information, data, text, and illustrations on this web site are Copyright (c) 1999, 2000, 2001, 2002, 2003, 2004, 2005, 2006, 2007, 2008, 2009, 2010, 2011, 2012, 2013, 2014, 2015, 2016, 2017, 2018, 2019, 2020, 2021 by Paul D. Race. Reuse or republication without prior written permission is specifically
forbidden.
Family Garden Trains is a participant in the Amazon Services LLC Associates Program, an affiliate advertising program designed to provide a means for sites to earn advertising fees by advertising and linking to amazon.com.
For more information, please contact us