| |||
 |
 |
 | |
 |
 | ||
 |
 | ||
 |  | ||
 |  | ||
| |||
|
|
| |
|
|
| ||
|
| ||
| | ||
| | ||
| Written by Paul D. Race for Family Garden Trains(tm)
and New Boston and Donnels Creek: |
 |


|
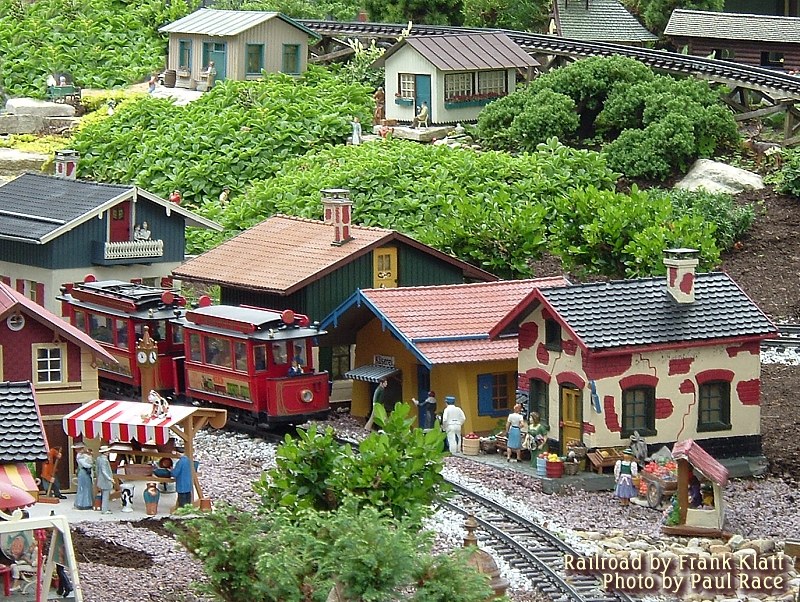
Trashbashing 101 - Updated for 2021This is a revision to an article I first published about 2000. While the basic principles of the original article still apply, enough things have changed, and I've learned enough lessons to justify rewriting the article with best practices in mind. In 2013, I added a bit of retrospective and some notes on the value and applications of trashbashing today. Since then, I have also added details on several of the projects that I have revisited since my original article. A lot of that had to do with wood, pressed wood, masonite, and other organic materials that I was able to protect from moisture and bugs for a time finally giving out altogether. Some of it had to do with repainting buildings whose paint had started to fail after about ten years outside (summer and winter). In January, 2016, I took all my buildings - except some North States bird feeders - inside for a change. So hopefully, they won't need a repaint for another ten years or more. If you've been reading our pages for a while, you know that when I first bought my garden train and started looking for accessories, most of the buildings available cost as much as my train and didn't remotely fit my vision for a US-inspired garden railroad.
A few manufacturers like Korber tried selling US-style buildings. But as a rule, those were hard to put together and expensive for what you got. Unexpected Sources for Scale US-Style BuildingsAt the same time that I was looking for US style buildings I could afford on our budget, Shelia and I were also looking for good-quality kids' toys at garage sales and flea markets. I did buy up some nice, clean Fisher Price and Playskool sets for my kids to use (they're in the attic now in case grandchildren ever arrive). But while I was shopping, I found a number of sets that were broken, moldy, crayoned-to-death, or otherwise not suitable for the nursery. And those structures I could adapt for garden train use with a "clear conscience." So I got early-1900s small-town look I wanted, created a unique city setting, and saved a couple hundred dollars at least. Here's an irony: back in the mid-1980s when I first told my garden railroading friends what I was planning to do, they laughed and said I was out of my mind. (I get that whenever I come up with an "out-of-the-box" workaround for some issue in the hobby, so I wasn't as offended as you might think.) A few months later, when I brought my finished buildings to a club meeting and set them out, the same folks wanted to know how much I would sell them for.
I admit that a few of the buildings' proportions still allow the "end result" to look a little toylike, but many of the buildings built specifically for garden railroads look toylike, too, so that's not a compelling argument against trashbashing. When I started a web page to help beginning and intermediate garden railroading families, I put together an article on Trashbashing, explaining the principles, but without many specifics. Not long ago, I put together a Step-by-Step article explaining the "best practices" of trashbashing in a series of detailed photographs. What Has ChangedSome folks today don't understand why I haven't replace my trashbashed buildings with the storebought equivalents that are now available. And it's true that POLA and Piko are providing some very nice US-style buildings. I know this, not only because I get the catalogs, but also because on many garden railroads I visit, I see the same eleven buildings (there are remarkable exceptions, of course).
Worthwhile Source Materials are Becoming Rarer.When I started trashbashing, Fisher Price and Playskool buildings were easy to find. Now they're getting fairly rare, and people are charging "collector" pricing even for buildings that are badly damaged.In addition, most of the "play set" buildings that have been produced since 1980 - even those by Fisher Price and Playskool - are way more toylike than the buildings produced in the 1960s and 1970s. I've come across a few off-brand pieces from the 1980s or 1990s that had reasonable scale, detail, and proportion, but they are in the minority. Fifteen years ago, it would have been reasonable for anyone who frequents garage sales and flea markets to consider using trashbashed buildings extensively on their railroad. A few worthwhile pieces are still available - including the North States church, barns, and light house, the Michaels' wood log cabin, etc. But most of the pieces I've found most valuable are getting hard to find in many parts of the country. So Why Trashbash in 2021?If most of the best trashbashing source materials are no longer available, while inexpensive alternatives are available, what's the point of keeping this approach alive? Here are some ideas:Some folks just love to scrounge. I have several friends who can afford to buy whatever they want for their hobbies, but they seem to get their most important "bragging rights" from getting something for nothing, or from turning nothing into something. Some folks are still finding good values. If you come across a busted-up toy building that you think you can use, give it a try. It takes only a little more work to prep most $10 Fisher Price buildings for use out doors than it does to prep most $120 buildings. Consider it practice, if nothing else. But don't be surprised if the damaged toy you rescued from a land fill becomes one of your favorite pieces. Your railroad will be unique. Yes, I have seen a few of these pieces, especially the all-plastic Playskool Sesame Street set on other people's railroads. But - no offense - very few people have taken the time to give this set the care and prep it deserves (see our Step-by-Step article for some tips). If you do, 99% of the people who see your railroad will assume you bought an expensive kit, and NOBODY will consider you a "me, too" railroader. But as for me and my railroad . . . At any rate, our original trashbashed buildings will remain an important part of the New Boston and Donnels Creek, because these are the buildings our railroad and our kids grew up with. Several of the businesses are even named after our kids. However you build up your little communities, don't be surprised if your kids get attached to one feature or another, or feel guilty about keeping a family favorite on display even when you can afford to replace it with something "better" later on. Remember, the "best" thing about any garden railroad, small or large, is the memories you've made with your family. Trashbashing in 2021 and BeyondHere are some notes for successful trashbashing in the coming years.First, keep your eye out for potential projects - but don't spend $45 on a collectible that will take a lot of work to restore when the same amount will get you a used, but restorable POLA or PIKO structure. Second - and here's my biggest "lesson learned" - remove all paper, labels, pressed-wood, and masonite from the building before you start restoring it. For the lowest maintenance, structural components should be replaced with Plexiglass if possible. Organic material to be removed includes:
In addition, solid wood components, such as the wood end walls on the Fisher Price Cape Cod house will eventually need maintenance, but they're not nearly as prone to failure as the pressed-wood parts we've discussed. Third, follow the "best practices" for all plastic model building, as documented in our articles Painting Plastic Structures and Glazing Windows with Lucite. Our "Trashbashing Step-by-Step article illustrates each step of repainting several plastic toy buildings with multple photographs. Fourth, take advantage of our free downloadable graphics to detail your buildings. In the older photos of my Fisher Price buildings, you can see the "brick paper" and signage that I printed to dress up the side walls. For those original graphics, I used an Alps printer and thin sheets of plastic. Other graphics I printed the same way are still holding up, but I lost the sidewall graphics as the sidewalls disintegrated. Today, I can get the same effect from my color laser and waterproof labels. If you don't have access to a color laser, you can still order the labels and take our graphics to Staples or wherever to print off. (Check out our Sticker Sheets page for more information. Fifth, potentially useful pieces still turn up. I'm not saying to spend a lot of time searching actively for them, but if you come across something inexpensive that you could visualize on your railroad with a new paint job and details, you might consider it. Building-Specific HintsNow with all of the generalities out of the way, I'll look at some of the buildings you might still come across.
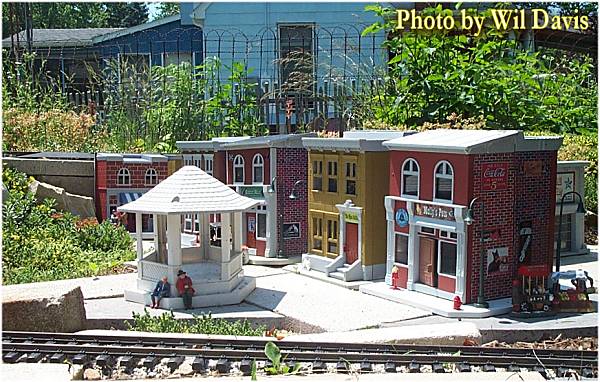
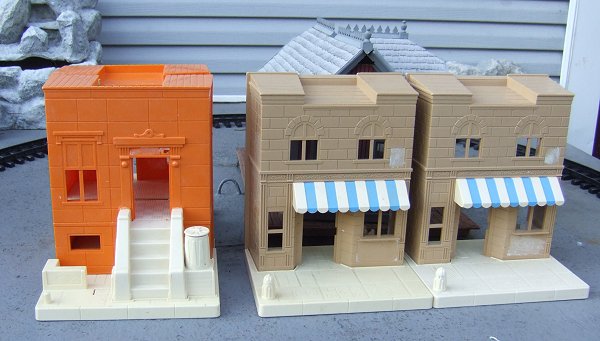
This set comes hinged together by a floating hinge arrangement. Take a hacksaw to all four places where the hinge attaches to the buildings. Also, hacksaw the handle in two and remove it as well as the places where it attaches to the roof of the buildings.
|

|
|
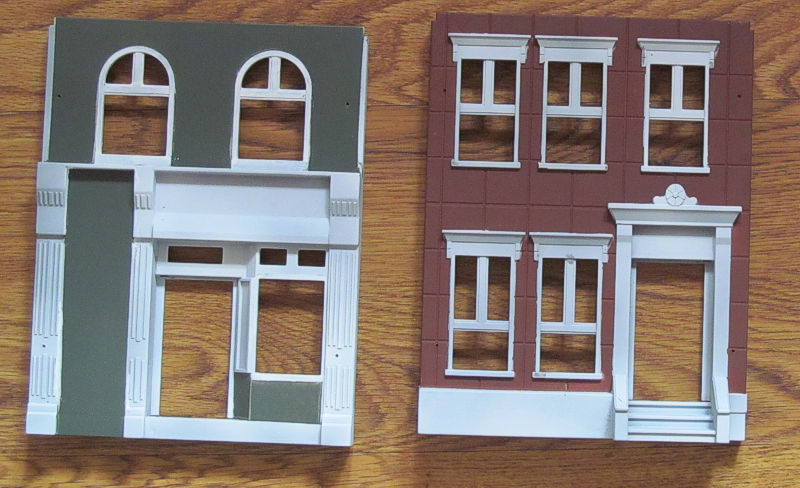
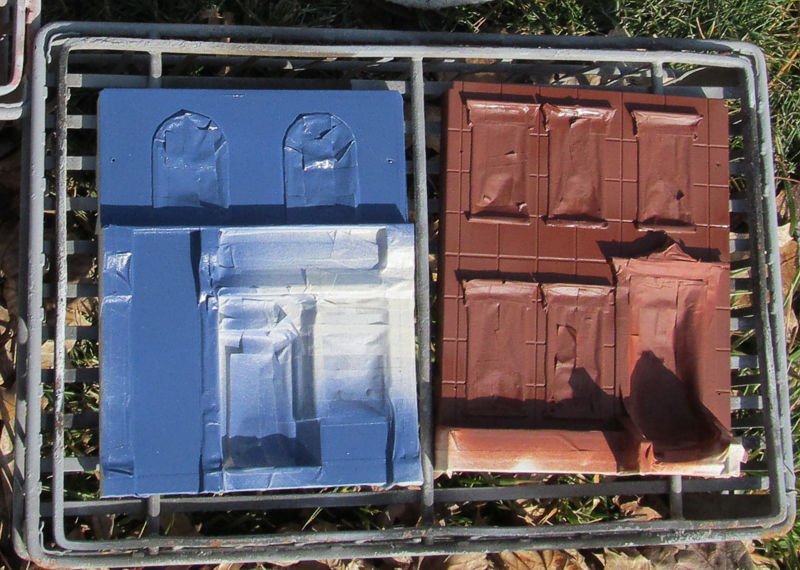
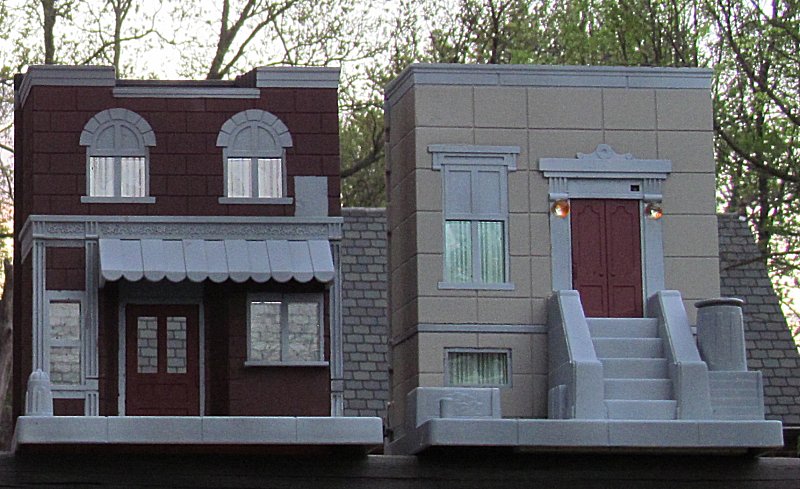
 If you want to replace the sides directly, find some thick plexiglass and cut out four pieces of 4"x9.5" plexiglass for each pair of buildings. My source of plexiglass for this project was old signage that was discarded from a fast food restaurant when they changed their menu. The photo to the right includes the plexiglass sidewall "blanks." They've been coated on the outside with rust primer twice, and on the inside with gray primer once. Your mileage will vary.
By the way, when I replaced the sidewalls with a thinner material, the interior floors became almost useless. If you want to detail the inside of the top floors, you'll want to figure out how to reinstall them. I like to put curtains in the top floor windows, so the floors are not important. Plus, leaving them out makes it easier to light the buildings.
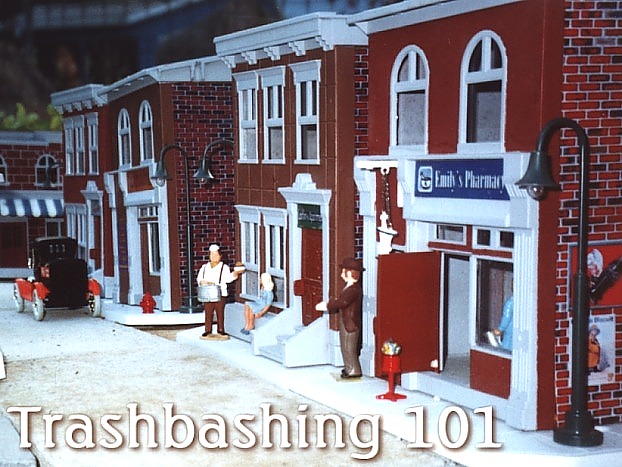
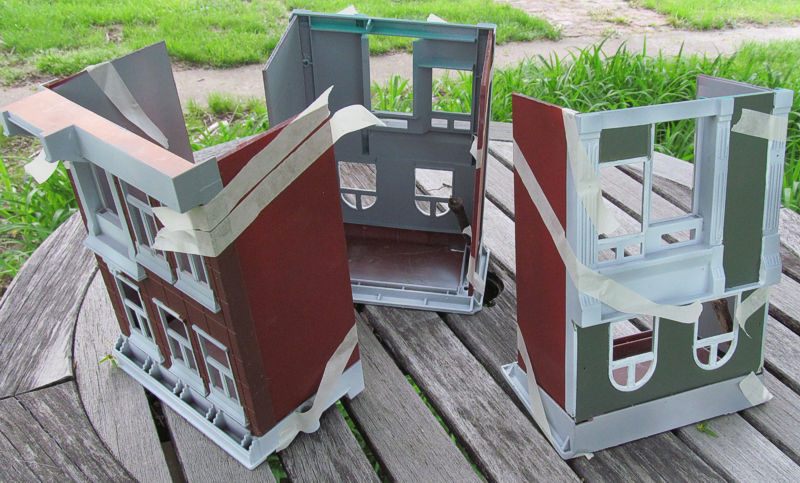 I glued the roof to the face and side walls first, using a gooey, slow-setting but effective cheap goo called "Fix All" from Big Lots. Then I taped and braced things so they would stay in place until the glue set (overnight). It is critical for the walls to fit firmly inside the "flange" of the building face.
For my most recent efforts, I turned the roof on the storefront around, which made the fit less sturdy, but gave me opportunity to simulate a cornice. A day or so later, I glued the base on. Ironically, a few of my plexiglass pieces were 1/8" short, so forcing the back corner of the sidewall to contact the building foundation made the building face tilt too much. I braced the sidewalls so that they didn't actually touch the building foundation, but put enough of the "Fix All" to fill bridge the gap without flowing out onto the sidewalk and making it shiny. That probably wasn't a "best practice," but it worked. Later I used colored silicon caulk to fill the gap between the raised part of the foundation and the sidewalls. At this point, I feel the buildings are fairly solid. Glazing, curtains, and lighting are covered elsewhere. Backs will be painted "road spam" material, velcroed in place so they can be popped off for lighting maintenance, etc.
Unlike the sets with pressed-wood or Masonite components, you don't have to remove and fabricate any components. Our Step-by-Step article shows this set in every stage of progress.
 |  |  |
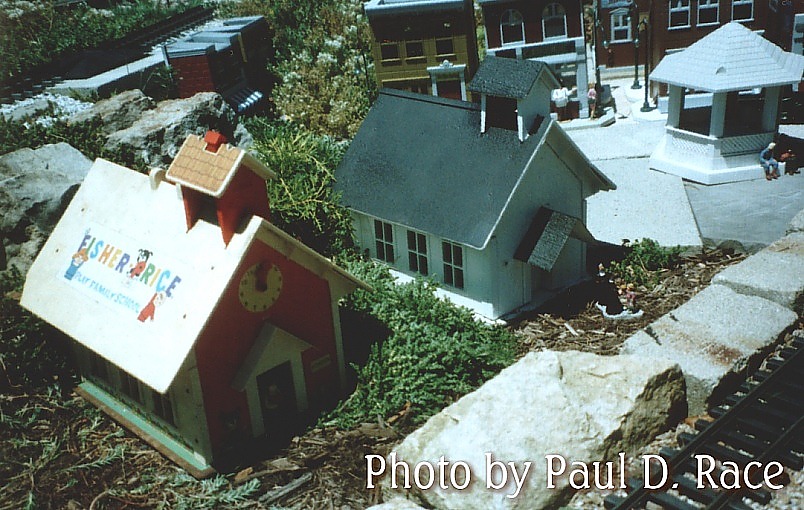 Fisher Price Schoolhouse to Church
To make a church from the school house, unscrew the building ends from the floor - the whole thing will come apart. Drill out the little rivets connecting the green "blackboard" to the sidewall so that the window openings show through.
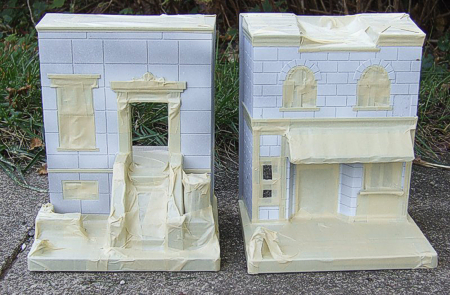
Cut a piece of plexiglass at least as large as the building base. I spraypainted mine with gray primer, though you could use a grassy color or something along the edges if you wanted to. Cut two more pieces the shape of the end walls.
The pattern I created for the windows is on our Resource page. The materials I used to create the windows are no longer available. However, you can do a credible replacement by printing this pattern on overhead transparency film with a laser printer. When you mount it, mount it shiny side out. If the colors don't seem rich enough, consider printing the graphic again and glueing another layer inside the first layer.
I used a V-shaped bit of vinyl siding left over from our house to extend the portico. I spraypainted the roof with auto trunk paint to give it some texture. Though the can said it was not to be used outside, the paint lasted several years. It might have lasted longer with a clear acrylic coat over the top.
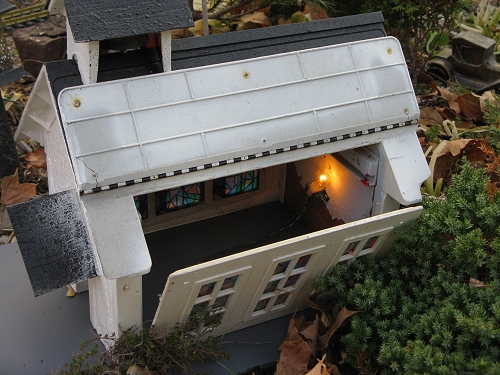 I also added 12-volt lighting that complements the low-voltage garden lighting systems I installed the same year. This way, you can see the stained glass windows glowing at night.
This building comes with a hinged roof that I left intact when I trashbashed it, a nice place for storing track cleaning pads and things.
Note: In 2013, I revisited this building and replaced the masonite base and pressed-wood ends, which had started to go bad. The article on that effort is here
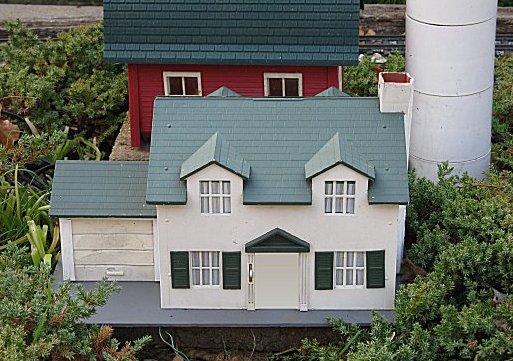
I soaked the labels off the Cape Cod, 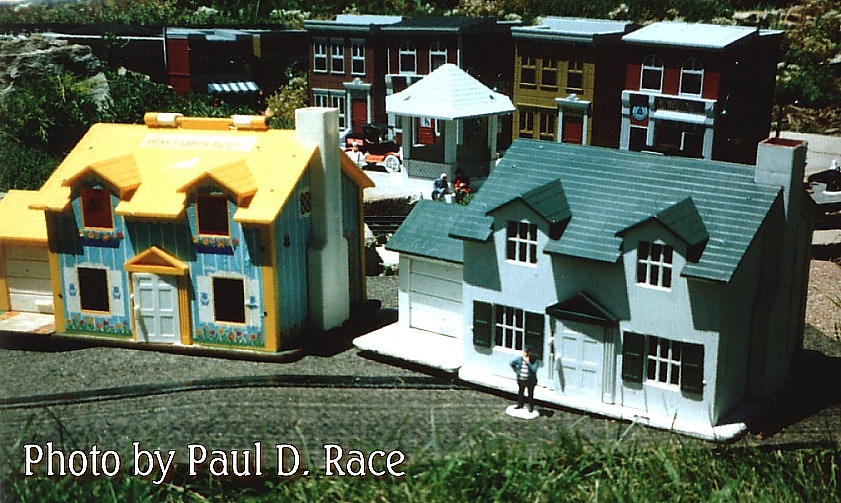 , then primed and painted it.
For the windows I cut out mullions (frames) from a strawberry basket. I also added Precision Products shutters that were left over from another project. Then I glued Lucite pieces behind the mullions to provide "windows" and to keep the (rather frail) mullions from being pushed out by careless handling. I then installed lighting, using the same kind of fixture I used for the church above.
 Later, to get the house ready for an evening open house, I also installed "curtains," using printouts that came with a Piko building kit. Finally, I replaced the base with rectangle of gray-primed Plexiglass with a hole in the middle for the wiring to come through. A more detailed description of that process, including photos of the masking, etc., is here.
The photo to the right shows the house with curtains installed, on its plexiglass base. It is sitting on a 2x8x16" steppingstone, waiting to be "backfilled" with gravel.
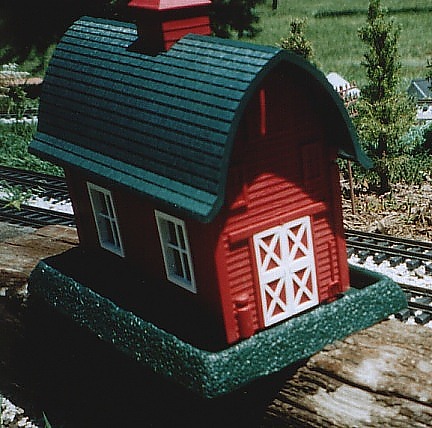 Looking for a barn that wouldn't take up too much room, I found a North States barn that has a small footprint and a believable, if remarkable roofline. The house/cabin version of this has doors that are too large for most garden trains, though it would make a nice, cheap addition for a 1:13 or so RR.
I planned to disassemble, paint, and detail this, but once I tried it out (sans the silly base), I liked how it looked well enough to put off upgrading it until I got some other things done. From the start it gave me a place to put all of my cow and goat figures. 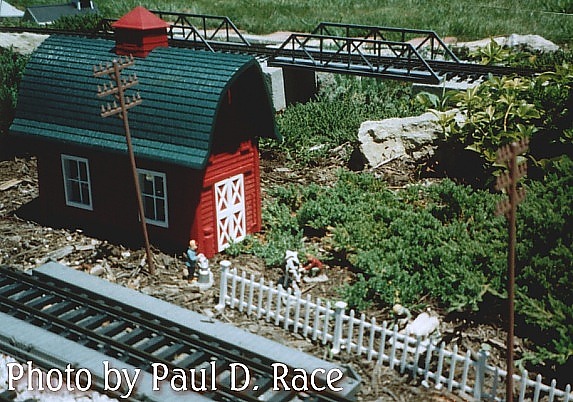 It also made a nice companion piece for the Fisher Price-sourced Cape Cod above.
North States also makes a church and lighthouse that are quite useful. The 2-window-per-side versions of the church and barn are available in my area at Menards and many farm supply stores. Mini-versions of some North States feeders show up at WalMart and similar stores, though they're not as useful.

 cut out the "gingerbread," and flopped the vertical members 180 degrees so that the "shallower" criss-crossed patterned panels formed a sort of "fence" around the base.
The result has done good service on my railroad for several years, and recently gained some improvements. It has also become a popular project among my readers and fellow hobbyists. Since similar products are still available from time to time, I have added an article with more details and photos.
 Fisher Price Castles - When we considered using a discontinued G gauge Hogwarts Express train for our annual Christmas-themed open railroad, we also wondered how to make that train look at home without spending hundreds of dollars or hundreds of hours, or both, trying to build a representation of Hogwarts Castle. We settled for repurposing some battered old toy castles in a way that would let us use them for other purposes. But they served this purpose just fine, I think.
Now that I have more buildings than I can fit on my existing layout properly, and access to a far wider variety of building kits than I once did, I don't feel as compelled to track down so many potential projects. But it was fun while it lasted. And if you visit any older garden railroads, you will probably see that my efforts along this line were far from unique.
 I had my 9 year old build
some "forts" out of some knock-off lincoln logs. The sets, especially the
non-Lincoln log types, are CHEAP and can be used to build several log cabins
near a mining or logging location. Robby did just that this week.
I had my 9 year old build
some "forts" out of some knock-off lincoln logs. The sets, especially the
non-Lincoln log types, are CHEAP and can be used to build several log cabins
near a mining or logging location. Robby did just that this week.
Also, some of the lego-knock-offs have castles and buildings that you can pick up at garage sales. Find families have garage sales and start buying.
I use the parts of old pull trains for display around the engine house (like a mini-junk parts bin behind the engine house. It's realistic.
David DeMoss says: . . . one of my "conversions" . . . started out as a "Hello Kitty" playhouse. As made, it came in bright cheerful colors, but the scale is close, and I thought it would look good in the layout. The back is flat and used to unfold for the "yard", but I glued that in place and the house sits against some fence with a cow farm as it's front yard.
It was painted with house paint, and has held up well. It's in the shop for repainting, after its 4 year stint on the layout.
The chimney in the center was made from "brick" styrene sheet,and covers the spot where the carry handle was. The bricks sheets were painted, and over time it has weathered nicely to a realistic brick color.
All told, I probably bought the house for a buck or two, and used some leftover paints and a little time, and ended up with a cute additon to my layout.


|
| 
|
|
 |
|
 |
 |
Note: Family Garden TrainsTM, Garden Train StoreTM, Big Christmas TrainsTM, BIG Indoor TrainsTM, and BIG Train StoreTM are trademarks of Breakthrough Communications (www.btcomm.com). All information, data, text, and illustrations on this web site are Copyright (c) 1999, 2000, 2001, 2002, 2003, 2004, 2005, 2006, 2007, 2008, 2009, 2010, 2011, 2012, 2013 by Paul D. Race. Reuse or republication without prior written permission is specifically
forbidden.
Family Garden Trains is a participant in the Amazon Services LLC Associates Program, an affiliate advertising program designed to provide a means for sites to earn advertising fees by advertising and linking to amazon.com.
For more information, please contact us

 |  |